Android Web View Tutorial
Android Web-View
Android Web View Tutorial allows your app to open up web pages within your app without leaving your app. For example, if you app needs to have access to news rss, you can use WebView to pull the links and allows app users to read the news without leaving your app.
WebView Needs Internet Permission
To use it, you need to have to add the permission from AndroidManifest.xml file.
<uses-permission android:name="android.permission.INTERNET" />
and you can then open a webpage within your code
Uri uri = Uri.parse("Example Domain");

Intent intent = new Intent(Intent.ACTION_VIEW, uri);

startActivity(intent);
Android’s Webview, as described by Google, is a “system component powered by Chrome that allows Android apps to display web content.” In other words, Webview allows 3rd party apps to show content in an in-app browser or in an app screen that pulls from the web. It’s pretty important, and has only recently (with Lollipop) been decoupled as a stand-alone system component that can be updated as Google sees fit. And that’s important, because it allows Google to push security fixes and other enhancements without the need to push an entire system update.
Step by step Tutorial:
Step 1 : Open the Android studio.
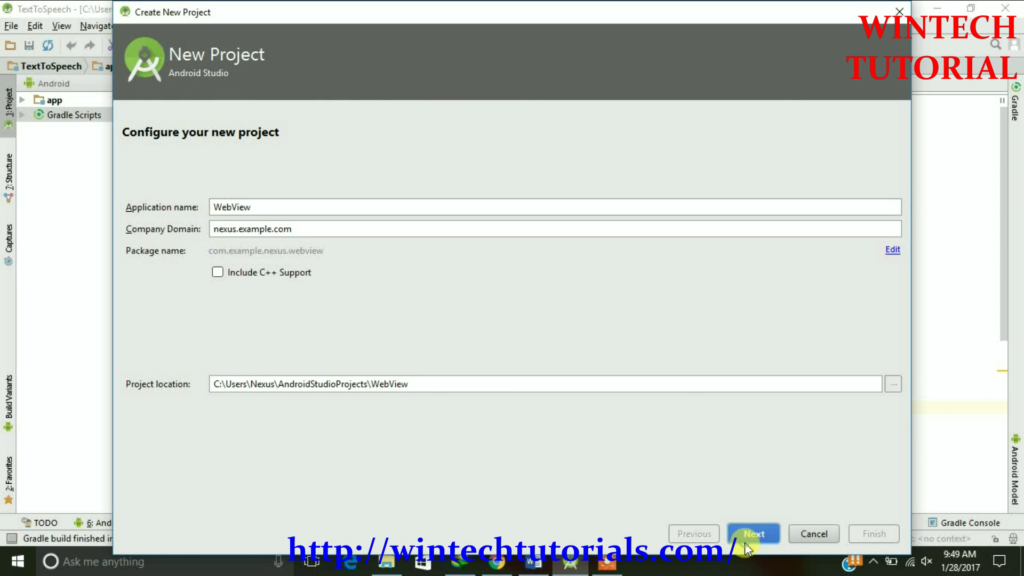
Step 2 : Click on New Project option
Step 3 : This is called Configure your project where you gibe a name to your project and define you domain. Give the name of your application. (for example: WebView). Give the Company domain name or you can leave it as. And give the project location.
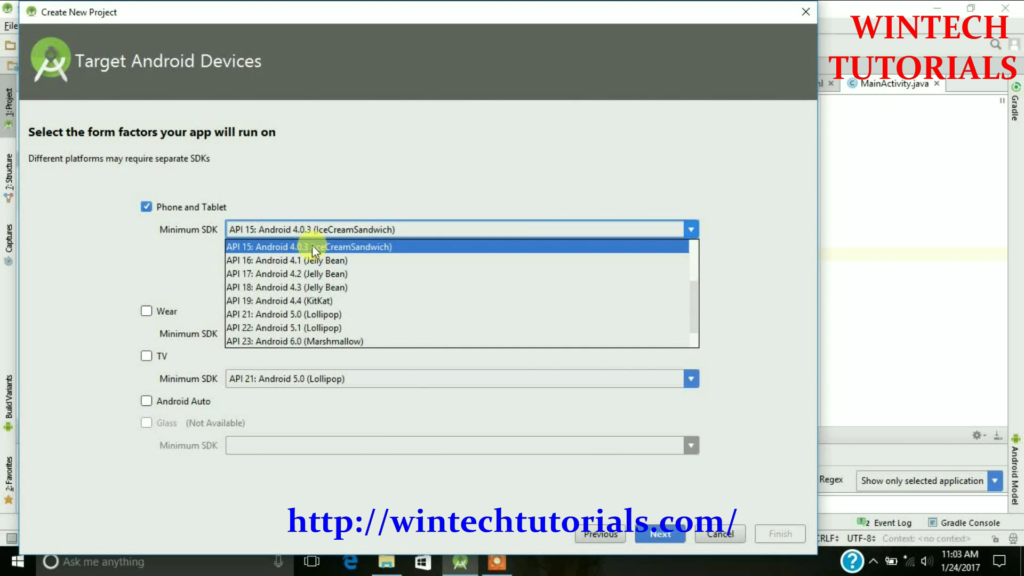
Step 4. After New Project Name Screen there come where you have to choose the particular android version. It implies/ tells us the compatibility of our project in different android platforms. To Study about Available Android Version Click here.
Step 5. In this part you have to select from the provided templates and the result project will be as similar that is displayed on the particular template as follows. It Act as the Main Class of this Project.
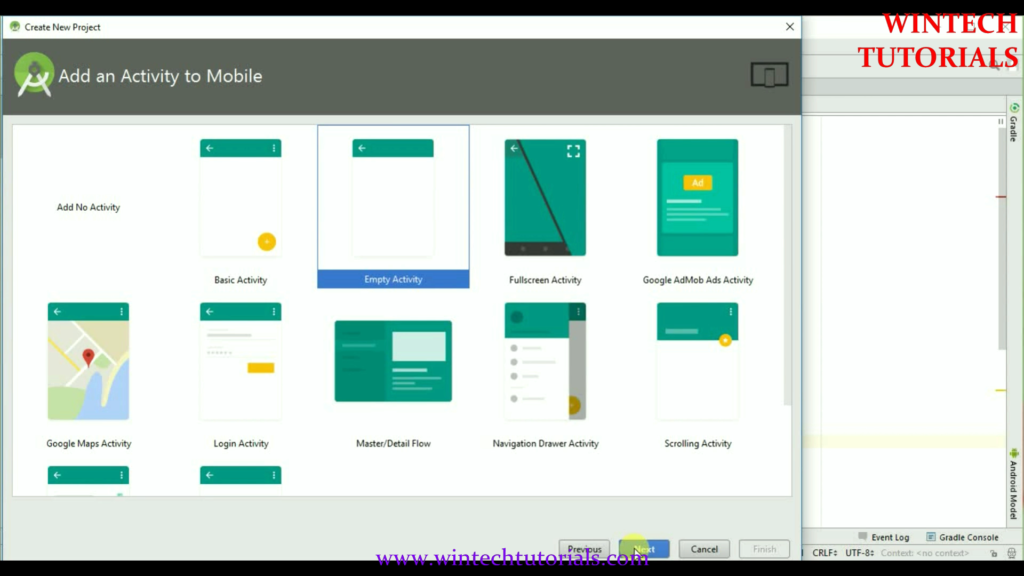
Here we Select the Empty Activity where we can do all the coding.
Step 6. Give Activity Name, Layout Name, and title to selected Activity. In this I name It “MainActivity” and the layout name as “activity_main” as well.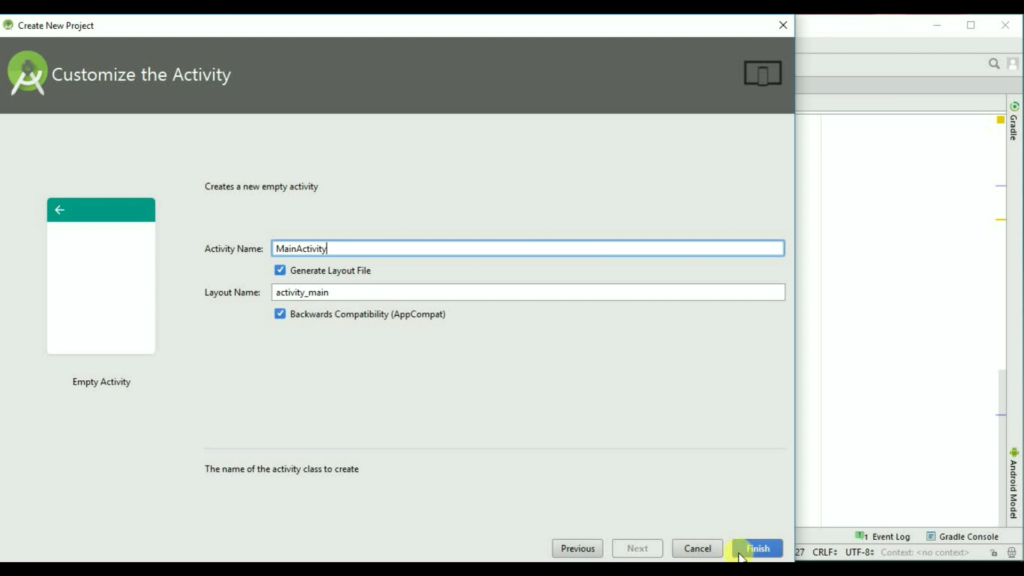
Step 7. After you click on finish button on the last screen then the android will start to build the empty project for you. where you have to design your own layout and implement your own function. once finish it redirect us to the MainActivity.java page. where all the coding part is done.
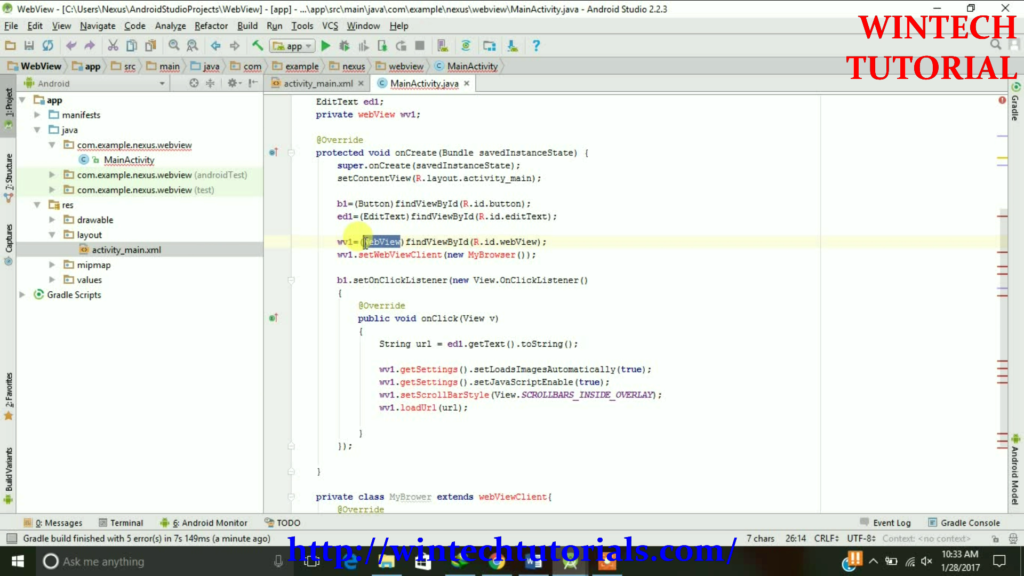
In Here i use the code
public void onClick(View v)
             {
                 String url = ed1.getText().toString();
                wv1.getSettings().setLoadsImagesAutomatically(true);
                 wv1.getSettings().setJavaScriptEnabled(true);
                 wv1.setScrollBarStyle(View.SCROLLBARS_INSIDE_OVERLAY);
                 wv1.loadUrl(url);
            }
where String url=ed1.getText().toString() It means what ever URL you fill into the editText ed1 and after that click on the button then the particular web page will open in web view part.
Another method is also very simple hist replace
String url = ed1.getText().toString();
with
String url = "http://wintechtutorials.com/";
once you do that now you don’t need to fill the URL at your application. when you open the app it redirect you to the http://wintechtutorials.com/
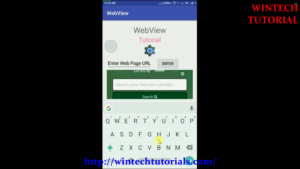
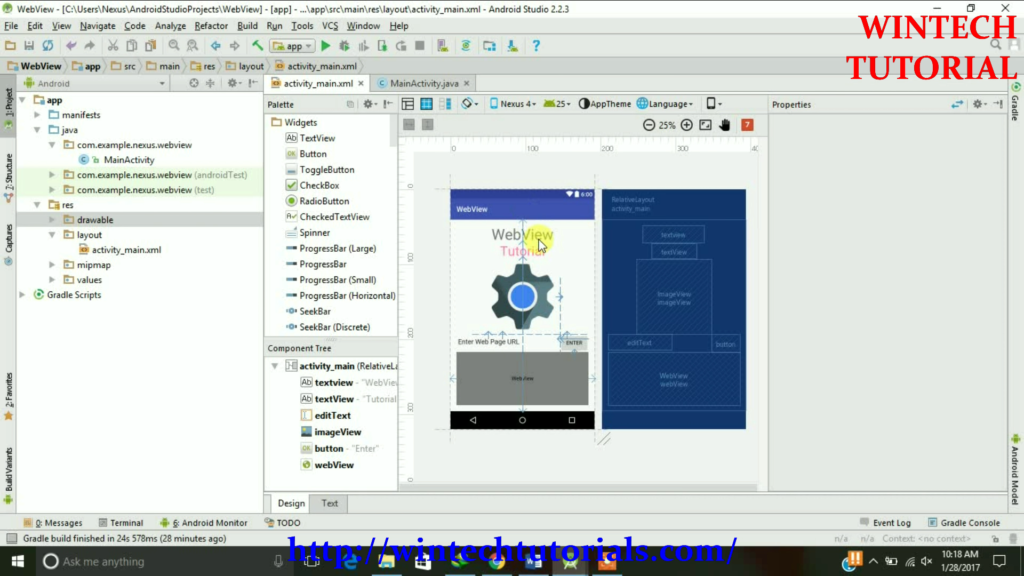
Step8. working on activity_main.xml for the designing part. Here i use and edit text where you have to write the text and a button. when you press that button then the Web View open the particular URL Entered in the Edit Text.
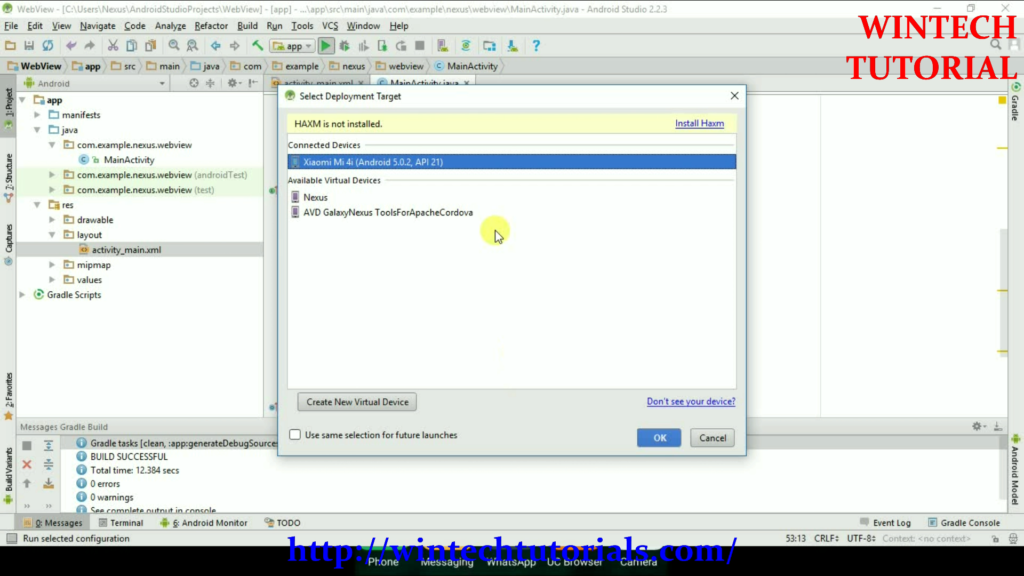
To run the app from Android studio, open one of your project’s activity files and click Run icon from the tool bar. Android studio installs the app on your AVD and starts it and if everything is fine with your set-up and application, it will display following Emulator window –
Here i use the android phone to run the project because Android Emulator takes so much time to process and sometimes it stuck in the process.
Coding:
MainActivity.java
package com.example.nexus.webview;

 import android.support.v7.app.AppCompatActivity;
 import android.os.Bundle;
 import android.widget.Button;
 import android.widget.EditText;
 import android.webkit.WebViewClient;
 import android.webkit.WebView;
 import android.view.View;

 public class MainActivity extends AppCompatActivity {

     Button b1;
     EditText ed1;
     private WebView wv1;

     @Override
     protected void onCreate(Bundle savedInstanceState) {
         super.onCreate(savedInstanceState);
         setContentView(R.layout.activity_main);

         b1=(Button)findViewById(R.id.button);
         ed1=(EditText)findViewById(R.id.editText);

         wv1=(WebView)findViewById(R.id.webView);
         wv1.setWebViewClient(new MyBrowser());

         b1.setOnClickListener(new View.OnClickListener()
         {
             @Override
             public void onClick(View v)
             {
                 String url = ed1.getText().toString();
 //String url = "https://www.tutorialspoint.com";
                 wv1.getSettings().setLoadsImagesAutomatically(true);
                 wv1.getSettings().setJavaScriptEnabled(true);
                 wv1.setScrollBarStyle(View.SCROLLBARS_INSIDE_OVERLAY);
                 wv1.loadUrl(url);

             }
         });

     }

        private class MyBrowser extends WebViewClient {

            @Override
            public boolean shouldOverrideUrlLoading(WebView view,String url)
            {
                view.loadUrl(url);
                return true;
            }
     }
 }
Predefined URL
In this you predefined the url that you want to open.
b1.setOnClickListener(new View.OnClickListener()
         {
             @Override
             public void onClick(View v)
             {
                 //String url = ed1.getText().toString();
 String url = "https://www.tutorialspoint.com";
 //                wv1.getSettings().setLoadsImagesAutomatically(true);
 //                wv1.getSettings().setJavaScriptEnabled(true);
 //                wv1.setScrollBarStyle(View.SCROLLBARS_INSIDE_OVERLAY);
                 wv1.loadUrl(url);

             }
         });
activity_main.xml
<?xml version="1.0" encoding="utf-8"?>
 <RelativeLayout xmlns:android="http://schemas.android.com/apk/res/android"
     xmlns:tools="http://schemas.android.com/tools"
     android:id="@+id/activity_main"
     android:layout_width="match_parent"
     android:layout_height="match_parent"
     android:paddingBottom="@dimen/activity_vertical_margin"
     android:paddingLeft="@dimen/activity_horizontal_margin"
     android:paddingRight="@dimen/activity_horizontal_margin"
     android:paddingTop="@dimen/activity_vertical_margin"
     tools:context="com.example.nexus.webview.MainActivity">

     <TextView
         android:layout_width="wrap_content"
         android:layout_height="wrap_content"
         android:text="WebView"
         android:textSize="30dp"
         android:id="@+id/textview"
         android:layout_alignParentTop="true"
         android:layout_centerHorizontal="true"/>

     <TextView
         android:layout_width="wrap_content"
         android:layout_height="wrap_content"
         android:text="Tutorial"
         android:id="@+id/textView"
         android:layout_below="@+id/textview"
         android:layout_centerHorizontal="true"
         android:textSize="25dp"
         android:textColor="#ff7a"/>

     <EditText
         android:layout_width="wrap_content"
         android:layout_height="wrap_content"
         android:id="@+id/editText"
         android:hint="Enter Web Page URL"
         android:focusable="true"
         android:textColorHint="#000000"
         android:textColorHighlight="#000000"
         android:layout_below="@+id/imageView"/>

     <ImageView
         android:layout_width="50dp"
         android:layout_height="50dp"
         android:id="@+id/imageView"
         android:src="@drawable/web"
         android:layout_below="@+id/textView"
        android:layout_centerHorizontal="true"/>

     <Button
         android:layout_width="wrap_content"
         android:layout_height="wrap_content"
         android:text="Enter"
         android:id="@+id/button"
         android:layout_alignTop="@+id/editText"
         android:layout_toRightOf="@+id/imageView"
         android:layout_toEndOf="@+id/imageView"/>

     <WebView
         android:layout_width="wrap_content"
          android:layout_height="wrap_content"
         android:id="@+id/webView"
         android:layout_below="@+id/button"
         android:layout_alignParentLeft="true"
         android:layout_alignParentEnd="true"
         android:layout_alignParentBottom="true"
         android:layout_alignParentRight="true"
         android:layout_alignParentStart="true">
     </WebView>
 </RelativeLayout>
Androidmanifest.xml
Add Internet Access permission. That’s It.
<?xml version="1.0" encoding="utf-8"?>
 <manifest xmlns:android="http://schemas.android.com/apk/res/android"
     package="com.example.nexus.webview">

     <uses-permission android:name="android.permission.INTERNET"/>
     <application
         android:allowBackup="true"
         android:icon="@mipmap/ic_launcher"
         android:label="@string/app_name"
         android:supportsRtl="true"
         android:theme="@style/AppTheme">
         <activity android:name=".MainActivity">
             <intent-filter>
                 <action android:name="android.intent.action.MAIN" />
                  <category android:name="android.intent.category.LAUNCHER" />
             </intent-filter>
         </activity>
     </application>

 </manifest>
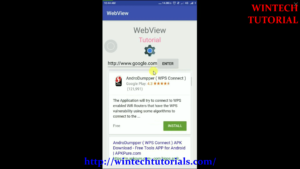
Output:
Add Url after the App is installed in Android Phone Predefined Url At The Code Level