
Android Get Location in Google Map with GPS and LocationManager – Tutorial
What is GPS
Android GPS or Global Positioning System is a network of orbiting satellites that send precise details of their position in space back to earth. The signals are obtained by GPS receivers, such as navigation devices and are used to calculate the exact position, speed and time at the vehicles location.
Location Manager
LocationManger class provides access to the system location services. These services allow applications to obtain periodic updates of the device’s geographical location, or to fire an application-specified Intent when the device enters the proximity of a given geographical location.
If you are developing any google map location based app, you can make your app more smarter by finding user’s location automatically. For this you need to integrate location modules in your application. This tutorial covers how to get users current location and show it on Google Map.
Step by Step Tutorial
Step 1: Open Android Studio.
Step 2: Create a new project as follows:
- If you see the Welcome to Android Studio dialog, choose Start a new Android Studio project, available under ‘Quick Start’ on the right of the dialog.
- Otherwise, click File in the Android Studio menu bar, then New, New Project.
Step 3: Enter your app name, company domain, and project location, as prompted. Then click Next.
Step 4: Select the form factors you need for your app. If you’re not sure what you need, just select Phone and Tablet. Then click Next.
Step 5: Select Google Maps Activity in the ‘Add an activity to Mobile’ dialog. Then click Next.
Step 6: Enter the activity name, layout name and title as prompted. The default values are fine. Then click Finish.
After that wait for few seconds. Android Studio starts Gradle and builds of your project.
Get a Google API Key
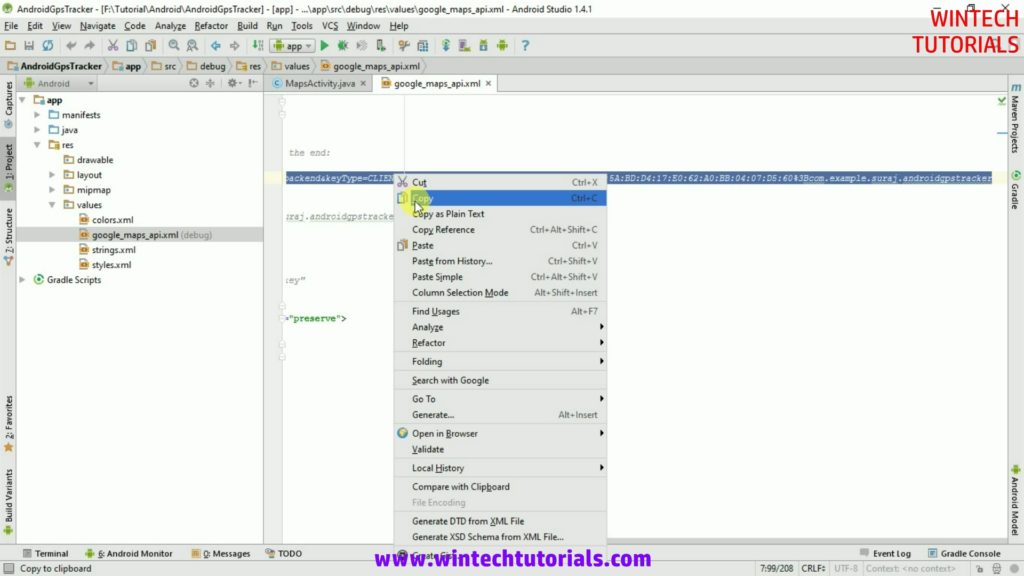
Step 7: Copy the link provided in the google_maps_api.xml file and paste it into your browser. The link takes you to the Google API Console and supplies the required information to the Google API Console via URL parameters, thus reducing the manual input required from you.
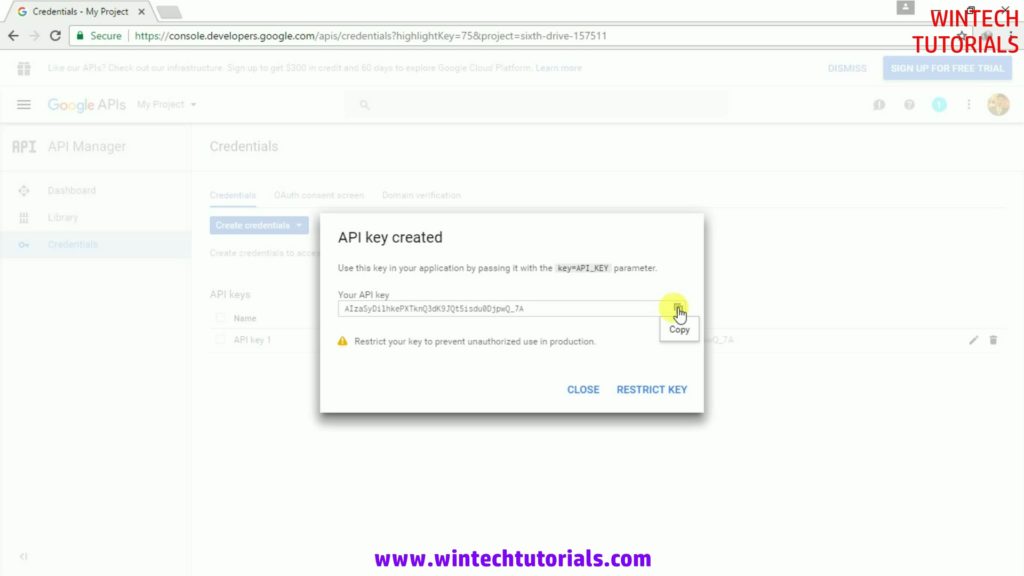
Step 8: Follow the instructions to create a new project on the Google API Console or select an existing project.

Step 9: Copy the resulting API key.
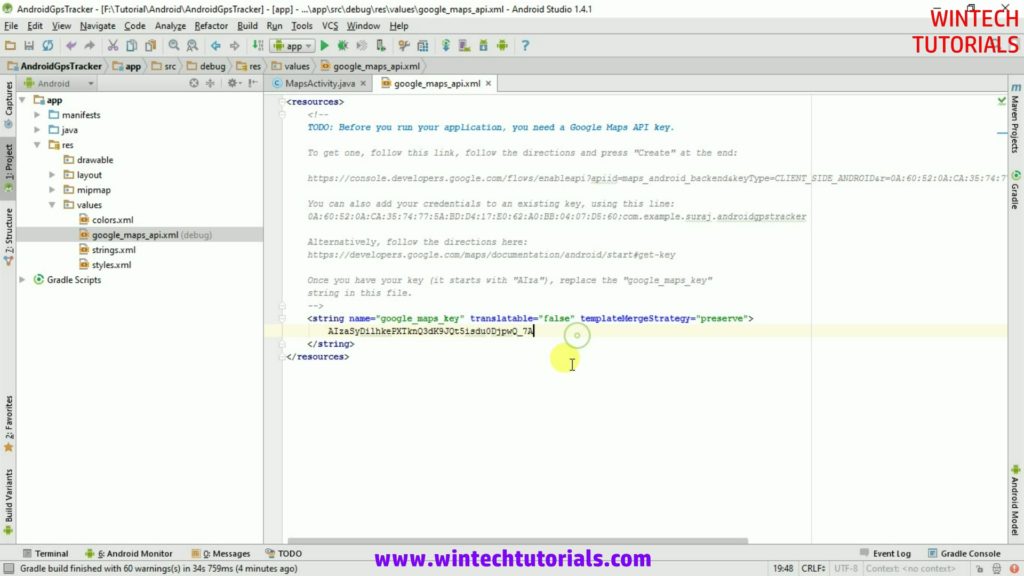
Step 10: Go back to Android Studio, and paste the API key into the <string> element in the google_maps_api.xml file.
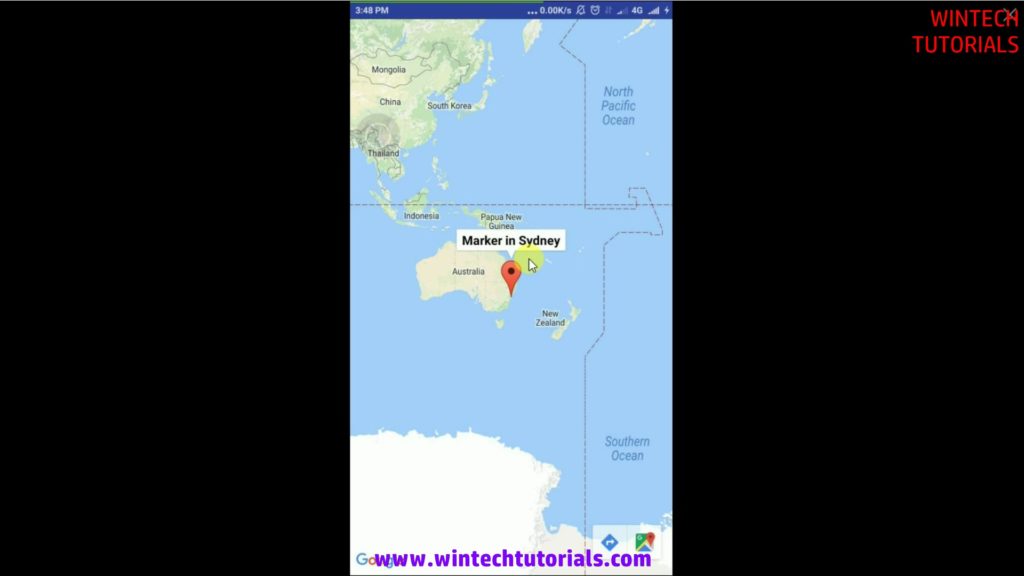
Step 11: Now debug your app (press shift+F10) in emulator or any attached device and see the output of build app. you will see the screen like below image.
Step 11: Add a new Java class file in your project.
- Goto Java folder and right click on package name=> New => Java Class
- Give the name to new creating java class file like “GPSTracker“.
Step 12: Now do the following cod into GPSTracker class file.
public class GPSTracker extends Service implements LocationListener {

    private final Context context;
    boolean isGPSEnabled =false;
    boolean isNetworkEnabled =false;
    boolean canGetLocation = false;

    Location location;
    protected LocationManager locationManager;

    public GPSTracker(Context context){
        this.context=context;
    }

    //Create a GetLocation Method //
    public  Location getLocation(){
        try{

            locationManager = (LocationManager) context.getSystemService(LOCATION_SERVICE);
            isGPSEnabled = locationManager.isProviderEnabled(locationManager.GPS_PROVIDER);
            isNetworkEnabled=locationManager.isProviderEnabled(locationManager.NETWORK_PROVIDER);

            if(ContextCompat.checkSelfPermission(context, Manifest.permission.ACCESS_FINE_LOCATION) == PackageManager.PERMISSION_GRANTED
                    || ContextCompat.checkSelfPermission(context, Manifest.permission.ACCESS_COARSE_LOCATION) == PackageManager.PERMISSION_GRANTED ){

                if(isGPSEnabled){
                    if(location==null){
                        locationManager.requestLocationUpdates(LocationManager.GPS_PROVIDER, 10000,10,this);
                        if(locationManager!=null){
                            location = locationManager.getLastKnownLocation(LocationManager.GPS_PROVIDER);
                        }
                    }
                }
                // if lcoation is not found from GPS than it will found from network //
                if(location==null){
                    if(isNetworkEnabled){

                            locationManager.requestLocationUpdates(LocationManager.NETWORK_PROVIDER, 10000,10,this);
                            if(locationManager!=null){
                                location = locationManager.getLastKnownLocation(LocationManager.NETWORK_PROVIDER);
                            }

                    }
                }

            }

        }catch(Exception ex){

        }
        return  location;
    }

    // followings are the default method if we imlement LocationListener //
    public void onLocationChanged(Location location){

    }

    public void onStatusChanged(String Provider, int status, Bundle extras){

    }
    public void onProviderEnabled(String Provider){

    }
    public void onProviderDisabled(String Provider){

    }
    public IBinder onBind(Intent arg0){
        return null;
    }

}
Step 13: Now make some changed in your MapsActivity java class file. do the following code.
public class MapsActivity extends FragmentActivity implements OnMapReadyCallback {

    private GoogleMap mMap;

    private GPSTracker gpsTracker;
    private Location mLocation;
    double latitude, longitude;

    @Override
    protected void onCreate(Bundle savedInstanceState) {
        super.onCreate(savedInstanceState);
        setContentView(R.layout.activity_maps);

        gpsTracker = new GPSTracker(getApplicationContext());
        mLocation = gpsTracker.getLocation();

        latitude = mLocation.getLatitude();
        longitude = mLocation.getLongitude();

        // Obtain the SupportMapFragment and get notified when the map is ready to be used.
        SupportMapFragment mapFragment = (SupportMapFragment) getSupportFragmentManager()
                .findFragmentById(R.id.map);
        mapFragment.getMapAsync(this);
    }

    @Override
    public void onMapReady(GoogleMap googleMap) {
        mMap = googleMap;

        // Add a marker in Sydney and move the camera
        LatLng sydney = new LatLng(latitude, longitude);
        mMap.addMarker(new MarkerOptions().position(sydney).title("I'm here..."));
        mMap.moveCamera(CameraUpdateFactory.newLatLng(sydney));
    }
}
Step 14: Now go to your AndroidManifest.xml file and add following line to get user permission.
<uses-permission android:name="android.permission.ACCESS_FINE_LOCATION" />
<uses-permission android:name="android.permission.ACCESS_COARSE_LOCATION" />
<uses-permission android:name="android.permission.ACCESS_FINE_LOCATION" />
Step 15: Now again debug your app in attached device and allow the permission before run the app in settings.
Note: Be ensure your GPS or Location service is enabled.
Full Source Code
AndroidManifest.xml
<?xml version="1.0" encoding="utf-8"?>
<manifest xmlns:android="http://schemas.android.com/apk/res/android"
    package="com.example.suraj.androidgpstracker" >

    <uses-permission android:name="android.permission.ACCESS_FINE_LOCATION" />
    <uses-permission android:name="android.permission.ACCESS_COARSE_LOCATION" />
    <uses-permission android:name="android.permission.ACCESS_FINE_LOCATION" />

    <application
        android:allowBackup="true"
        android:icon="@mipmap/ic_launcher"
        android:label="@string/app_name"
        android:supportsRtl="true"
        android:theme="@style/AppTheme" >

        <meta-data
            android:name="com.google.android.geo.API_KEY"
            android:value="@string/google_maps_key" />

        <activity
            android:name=".MapsActivity"
            android:label="@string/title_activity_maps" >
            <intent-filter>
                <action android:name="android.intent.action.MAIN" />

                <category android:name="android.intent.category.LAUNCHER" />
            </intent-filter>
        </activity>
    </application>

</manifest>
activity_maps.xml
<fragment xmlns:android="http://schemas.android.com/apk/res/android"
    xmlns:tools="http://schemas.android.com/tools"
    xmlns:map="http://schemas.android.com/apk/res-auto" android:layout_width="match_parent"
    android:layout_height="match_parent" android:id="@+id/map" tools:context=".MapsActivity"
    android:name="com.google.android.gms.maps.SupportMapFragment" />
GPSTracker
import android.*;
import android.Manifest;
import android.app.Service;
import android.content.Context;
import android.content.Intent;
import android.content.pm.PackageManager;
import android.location.Location;
import android.location.LocationListener;
import android.location.LocationManager;
import android.os.Bundle;
import android.os.IBinder;
import android.support.v4.content.ContextCompat;

import java.security.Permission;

/**
 * Created by Suraj on 03/02/2017.
 */

public class GPSTracker extends Service implements LocationListener {


    private final Context context;

    boolean isGPSEnabled =false;
    boolean isNetworkEnabled =false;
    boolean canGetLocation = false;

    Location location;
    protected LocationManager locationManager;

    public GPSTracker(Context context){
        this.context=context;
    }

    //Create a GetLocation Method //
    public  Location getLocation(){
        try{

            locationManager = (LocationManager) context.getSystemService(LOCATION_SERVICE);
            isGPSEnabled = locationManager.isProviderEnabled(locationManager.GPS_PROVIDER);
            isNetworkEnabled=locationManager.isProviderEnabled(locationManager.NETWORK_PROVIDER);

            if(ContextCompat.checkSelfPermission(context, Manifest.permission.ACCESS_FINE_LOCATION) == PackageManager.PERMISSION_GRANTED
                    || ContextCompat.checkSelfPermission(context, Manifest.permission.ACCESS_COARSE_LOCATION) == PackageManager.PERMISSION_GRANTED ){

                if(isGPSEnabled){
                    if(location==null){
                        locationManager.requestLocationUpdates(LocationManager.GPS_PROVIDER, 10000,10,this);
                        if(locationManager!=null){
                            location = locationManager.getLastKnownLocation(LocationManager.GPS_PROVIDER);
                        }
                    }
                }
                // if lcoation is not found from GPS than it will found from network //
                if(location==null){
                    if(isNetworkEnabled){

                            locationManager.requestLocationUpdates(LocationManager.NETWORK_PROVIDER, 10000,10,this);
                            if(locationManager!=null){
                                location = locationManager.getLastKnownLocation(LocationManager.NETWORK_PROVIDER);
                            }

                    }
                }

            }

        }catch(Exception ex){

        }
        return  location;
    }

    // followings are the default method if we imlement LocationListener //
    public void onLocationChanged(Location location){

    }

    public void onStatusChanged(String Provider, int status, Bundle extras){

    }
    public void onProviderEnabled(String Provider){

    }
    public void onProviderDisabled(String Provider){

    }
    public IBinder onBind(Intent arg0){
        return null;
    }

}
MapsActivity
import android.location.Location;
import android.support.v4.app.FragmentActivity;
import android.os.Bundle;

import com.google.android.gms.maps.CameraUpdateFactory;
import com.google.android.gms.maps.GoogleMap;
import com.google.android.gms.maps.OnMapReadyCallback;
import com.google.android.gms.maps.SupportMapFragment;
import com.google.android.gms.maps.model.LatLng;
import com.google.android.gms.maps.model.MarkerOptions;

public class MapsActivity extends FragmentActivity implements OnMapReadyCallback {

    private GoogleMap mMap;

    private GPSTracker gpsTracker;
    private Location mLocation;
    double latitude, longitude;

    @Override
    protected void onCreate(Bundle savedInstanceState) {
        super.onCreate(savedInstanceState);
        setContentView(R.layout.activity_maps);

        gpsTracker = new GPSTracker(getApplicationContext());
        mLocation = gpsTracker.getLocation();

        latitude = mLocation.getLatitude();
        longitude = mLocation.getLongitude();

        // Obtain the SupportMapFragment and get notified when the map is ready to be used.
        SupportMapFragment mapFragment = (SupportMapFragment) getSupportFragmentManager()
                .findFragmentById(R.id.map);
        mapFragment.getMapAsync(this);
    }


    @Override
    public void onMapReady(GoogleMap googleMap) {
        mMap = googleMap;

        // Add a marker in Sydney and move the camera
        LatLng sydney = new LatLng(latitude, longitude);
        mMap.addMarker(new MarkerOptions().position(sydney).title("I'm here..."));
        mMap.moveCamera(CameraUpdateFactory.newLatLng(sydney));
    }
}
18 thoughts on “Android Get Location in Google Map with GPS and LocationManager – Tutorial”
would you please provide us with the 2 build.gradle files 🙂
thanks in advance
appreciate your help
Thanks for the tutorial WinTECH,
but i have a question about this GPS tracker, i follow your tutorial and it works, i want to know how to auto zoom-in (lock) location on 1 city, can you help me?
To zoom in Location use code
mMap.moveCamera(CameraUpdateFactory.newLatLngZoom(my_loc, 12));
// Full Code:-
@Override
public void onMapReady(GoogleMap googleMap) {
mMap = googleMap;
// Add a marker in Sydney and move the camera
LatLng my_loc = new LatLng(latitude, longitude);
mMap.addMarker(new MarkerOptions().position(sydney).title(“I’m here…”));
mMap.moveCamera(CameraUpdateFactory.newLatLngZoom(my_loc, 12));
}
hi thanks for the tutorial, but the apps stopped working even i enable the gps. can you help me?
Please check the permission of GPS/Location is allowed or not.
Thanks Man It Just Works Perfectly
i got that error
java.lang.NullPointerException: Attempt to invoke virtual method ‘double android.location.Location.getLatitude()’ on a null object reference
and every hing is enabled ?
could i add a floating button that works in a way such that when i click on it will ask me to enable gps from within the app instead to doing it from the setting? if i could how would i do it?
No you can’t. Because it’s user rights to to allow GPS permission in setting.
my application crashed when i press button to access my current location…can you tell the problem? i checked code many time but there are no mistakes i seen ?? 🙁
You did not allow the permission of GPS. Please Allow the permission First.
I have a null pointer execption in mlocation and I don’t knox why because i do the same of you
can you tell me how to allow the permission of GPS please?
Manual Option => Go to Settings -> Apps -> select App -> Permision
For Programmatic see our tutorial: http://wintechtutorials.com/blog/android-request-multiple-permissions-runtime/
The app is crashing on phone despite keeping the GPS on and the permissions given
Pretty great post. I simply stumbled upon your blog and wanted to say that I’ve
truly enjoyed browsing your blog posts. After all I’ll be subscribing in your feed and
I’m hoping you write again very soon!
this method deprecated !?