
Android Text Converting Speech
Text To Speech
Android Text Converting Speech allows you convert your text into voice. Not only you can convert it but it also allows you to speak text in variety of different languages.
Android provides TextToSpeech class for this purpose. In order to use this class, you need to instantiate an object of this class and also specify the initListnere. Its syntax is given below –
private EditText write;

ttobj=new TextToSpeech(getApplicationContext(), new TextToSpeech.OnInitListener() {

   @Override

   public void onInit(int status) {

   }

});
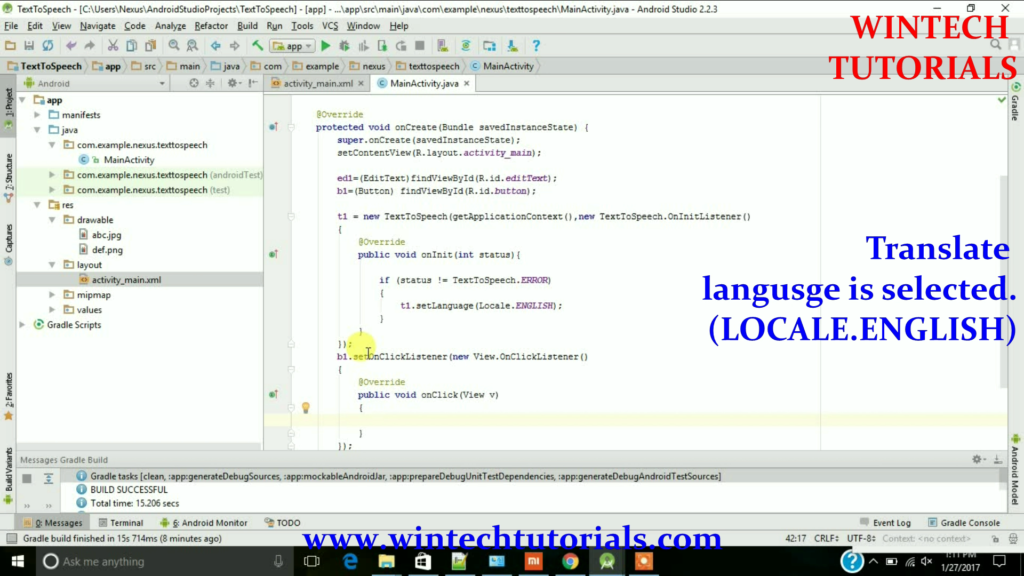
In this listener, you have to specify the properties for TextToSpeech object , such as its language ,pitch e.t.c. Language can be set by calling setLanguage() method. Its syntax is given below −
ttobj.setLanguage(Locale.UK); or (Locale.ENGLISH) //Both have same meaning…
Once you have set the language, you can call speak method of the class to speak the text. Its syntax is given below –
ttobj.speak(toSpeak, TextToSpeech.QUEUE_FLUSH, null);
The below tutorial demonstrates the use of TextToSpeech class. It crates a basic application that allows you to set write text and speak it.
To experiment with this example , you need to run this on an actual device.
| Steps | Description |
| 1 | You will use Android studio to create an Android application under a package com.example.nexus.texttospeech. |
| 2 | Modify src/MainActivity.java file. |
| 3 | Modify layout XML file res/layout/activity_main.xml add any GUI component if required. |
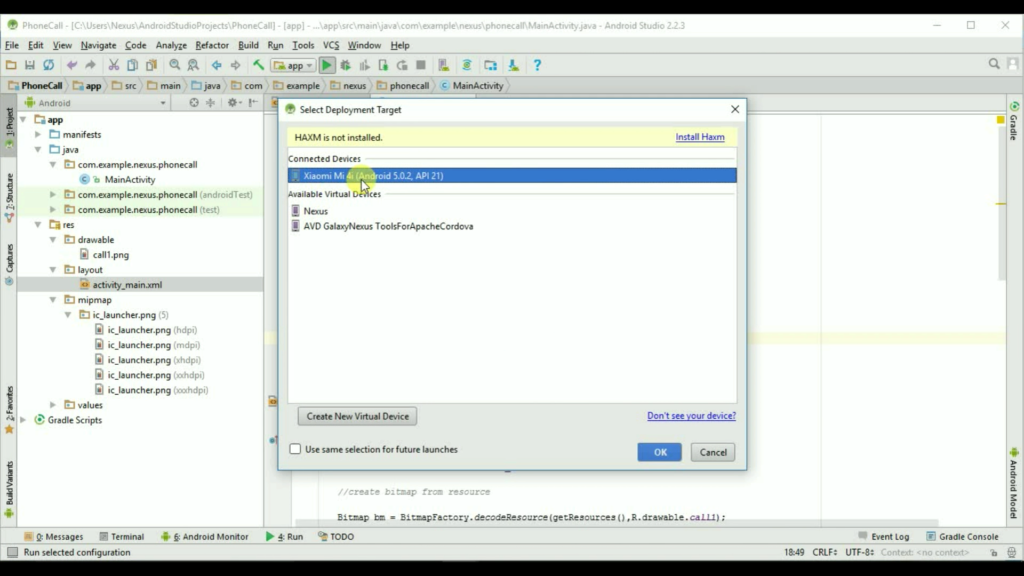
| 4 | Run the application and choose a running android device and install the application on it and verify the results. |
Step by step Tutorial:
Step 1 : Open the Android studio.
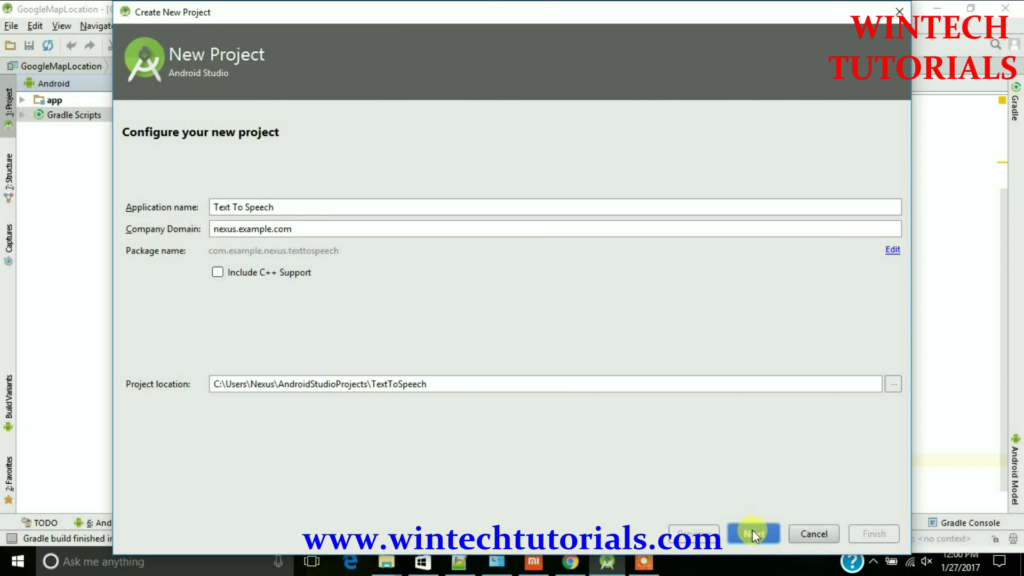
Step 2 : Click on New Project option
Step 3 : This is called Configure your project where you gibe a name to your project and define you domain. Give the name of your application. (for example: Text To Speech). Give the Company domain name or you can leave it as. And give the project location.
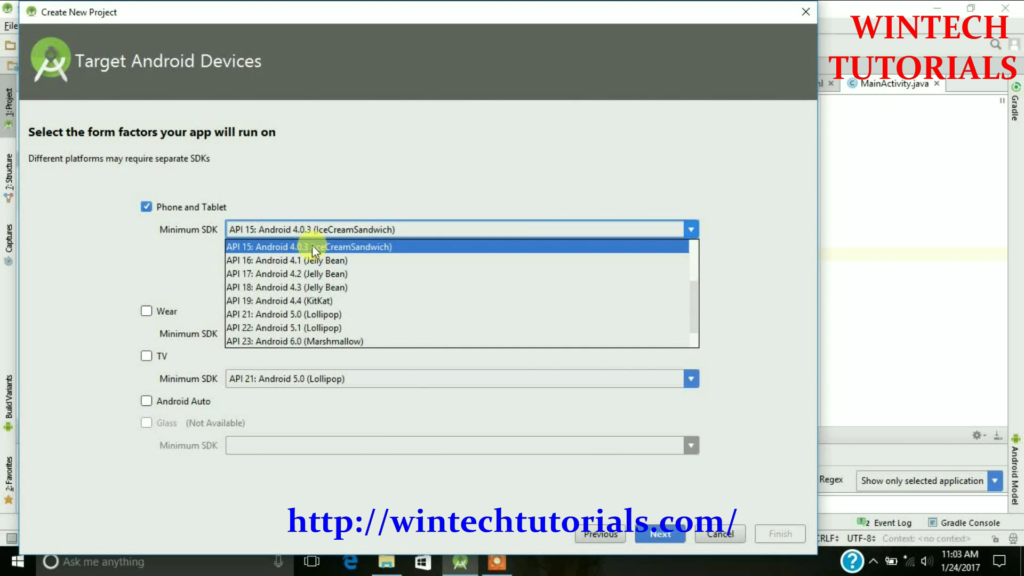
Step 4. After New Project Name Screen there come where you have to choose the particular android version. It implies/ tells us the compatibility of our project in different android platforms. To Study about Available Android Version Click here.
Step 5. In this part you have to select from the provided templates and the result project will be as similar that is displayed on the particular template as follows. It Act as the Main Class of this Project.
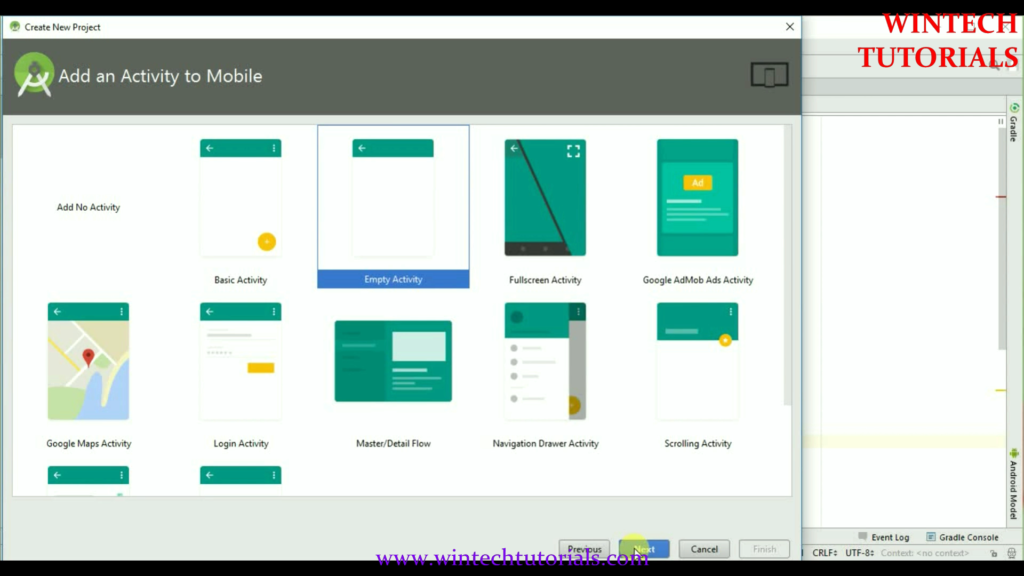
Here we Select the Empty Activity where we can do all the coding.
Step 6. Give Activity Name, Layout Name, and title to selected Activity. In this I name It “MainActivity” and the layout name as “activity_main” as well.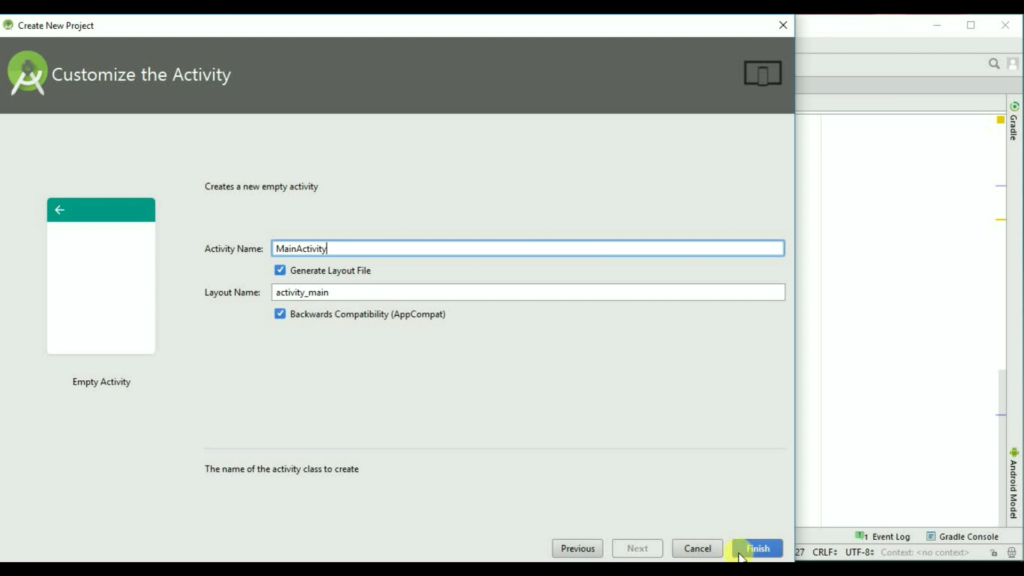
Step 7. After you click on finish button on the last screen then the android will start to build the empty project for you. where you have to design your own layout and implement your own function. once finish it redirect us to the MainActivity.java page. where all the coding part is done.
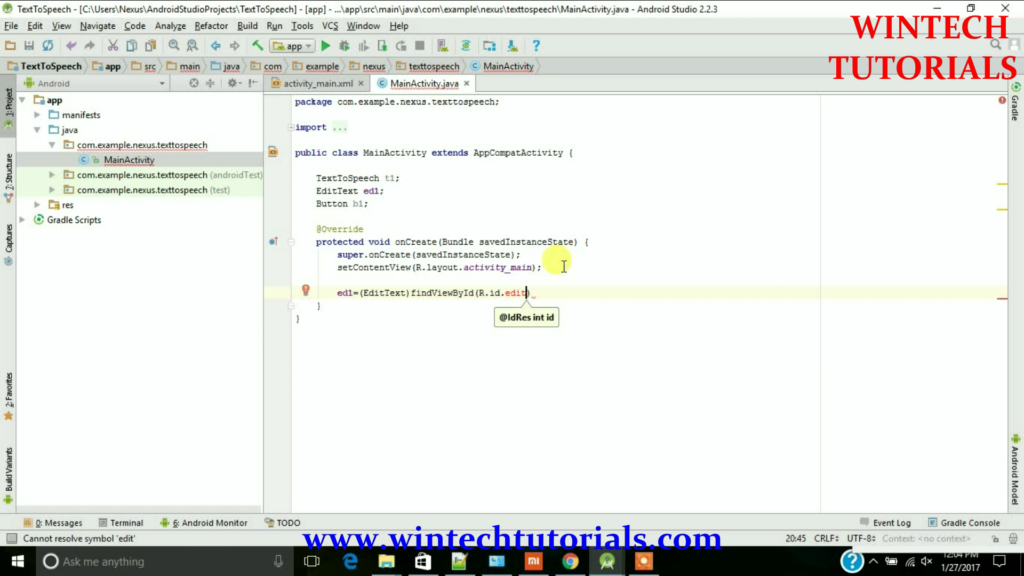
Now in this the RED TEXT Color Defined that it cant find any id so for that we have to create and Layout for it as follows.
Step8. working on activity_main.xml for the designing part. Here i use and edit text where you have to write the text and a button. when you press that button then the written text convert into the voice.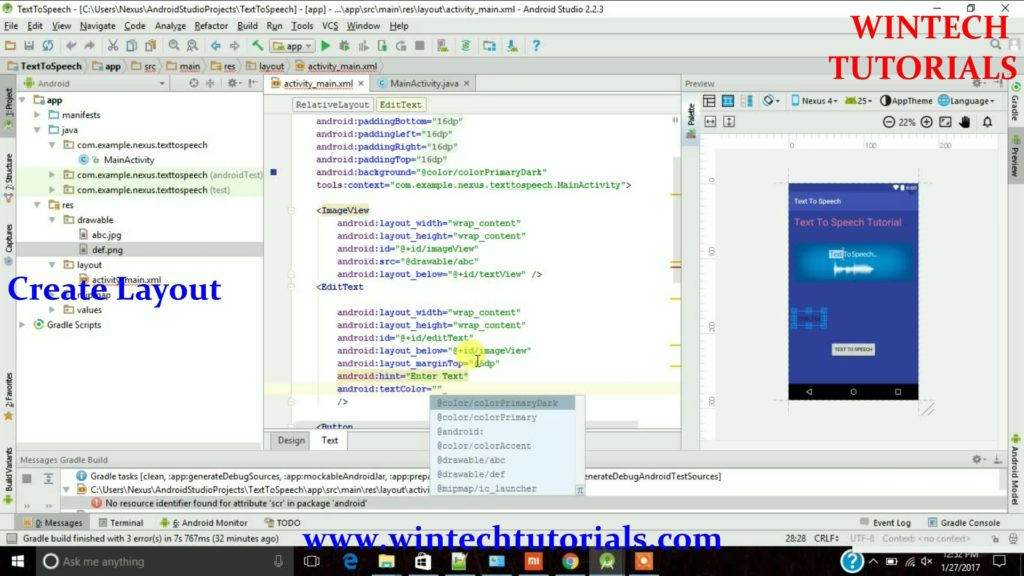
To run the app from Android studio, open one of your project’s activity files and click Run icon from the tool bar. Android studio installs the app on your AVD and starts it and if everything is fine with your set-up and application, it will display following Emulator window –
Here i use the android phone to run the project because Android Emulator takes so much time to process and sometimes it stuck in the process.
Codeing:
MainActivity.java
package com.example.nexus.texttospeech;

import android.speech.tts.TextToSpeech;
import android.support.v7.app.AppCompatActivity;
import android.os.Bundle;
import android.view.View;
import android.widget.Button;
import android.widget.EditText;
import android.widget.Toast;
import java.util.Locale;

public class MainActivity extends AppCompatActivity {

TextToSpeech t1;
 EditText ed1;
 Button b1;

@Override
 protected void onCreate(Bundle savedInstanceState) {
 super.onCreate(savedInstanceState);
 setContentView(R.layout.activity_main);

ed1=(EditText)findViewById(R.id.editText);
 b1=(Button) findViewById(R.id.button);

t1 = new TextToSpeech(getApplicationContext(),new TextToSpeech.OnInitListener()
 {
 @Override
 public void onInit(int status){

if (status != TextToSpeech.ERROR)
 {
 t1.setLanguage(Locale.ENGLISH);
 }
 }
 });
 b1.setOnClickListener(new View.OnClickListener()
 {
 @Override
 public void onClick(View v)
 {
 String toSpeak = ed1.getText().toString();
 Toast.makeText(getApplicationContext(),toSpeak,Toast.LENGTH_LONG).show();
 t1.speak(toSpeak, TextToSpeech.QUEUE_FLUSH, null);
 }
 });
 }

public void onPause()
 {
 if (t1 !=null)
 {
 t1.stop();
 t1.shutdown();
 }
 super.onPause();
 }
}
activity_main.xml
<?xml version="1.0" encoding="utf-8"?>
<RelativeLayout xmlns:android="http://schemas.android.com/apk/res/android"
 xmlns:tools="http://schemas.android.com/tools"
 android:id="@+id/activity_main"
 android:layout_width="match_parent"
 android:layout_height="match_parent"
 android:paddingBottom="@dimen/activity_vertical_margin"
 android:paddingLeft="@dimen/activity_horizontal_margin"
 android:paddingRight="@dimen/activity_horizontal_margin"
 android:paddingTop="@dimen/activity_vertical_margin"
 android:background="@color/colorPrimaryDark"
 tools:context="com.example.nexus.texttospeech.MainActivity">

<ImageView
 android:layout_width="wrap_content"
 android:layout_height="wrap_content"
 android:id="@+id/imageView"
 android:src="@drawable/abc"
 android:layout_below="@+id/textView" />
 <EditText

android:layout_width="wrap_content"
 android:layout_height="wrap_content"
 android:id="@+id/editText"
 android:layout_below="@+id/imageView"
 android:layout_marginTop="46dp"
 android:hint="Enter Text"
 android:textColorHint="#ffffff"
 android:textColor="#ffffff"
 android:layout_alignParentRight="true"
 android:layout_alignParentEnd="true"
 android:layout_alignParentLeft="true"
 android:layout_alignParentStart="true" />

<Button
 android:layout_width="wrap_content"
 android:layout_height="wrap_content"
 android:text="Text To Speech"
 android:id="@+id/button"
 android:layout_below="@+id/editText"
 android:layout_centerHorizontal="true"
 android:layout_marginTop="46dp"/>

<TextView
 android:layout_width="wrap_content"
 android:layout_height="wrap_content"
 android:text="Text To Speech Tutorial"
 android:layout_alignParentTop="true"
 android:textColor="#ff7a97"
 android:textSize="30dp"
 android:layout_alignParentRight="true"
 android:layout_alignParentEnd="true"
 android:layout_alignParentLeft="true"
 android:layout_alignParentStart="true"
 android:id="@+id/textView" />


</RelativeLayout>
 Image File abc.png
AndroidManifest.xml
<?xml version="1.0" encoding="utf-8"?>
<manifest xmlns:android="http://schemas.android.com/apk/res/android"
 package="com.example.nexus.texttospeech">

<application
 android:allowBackup="true"
 android:icon="@mipmap/ic_launcher"
 android:label="@string/app_name"
 android:supportsRtl="true"
 android:theme="@style/AppTheme">
 <activity android:name=".MainActivity">
 <intent-filter>
 <action android:name="android.intent.action.MAIN" />

<category android:name="android.intent.category.LAUNCHER" />
 </intent-filter>
 </activity>
 </application>

</manifest>
Output:


In here when you click on the Hint(Enter Text) then keyboard is open and you type anything. after that click on the TEXT TO SPEECH Button and you here what you write on it along with the Toast message of your Text.