
Android Push Notification(Firebase Cloud Messaging)
Android Push Notification(Firebase Cloud Messaging)
Hello friends, I got a lot of messages requesting to publish Android Push Notification(Firebase Cloud Messaging) using FCM tutorial. So today I am posting it. Majority of people finds android push notification using fcm is a difficult task. Now if you also had trouble or still stuck in implementing android push notification using fcm then don’t worry today I came up with an easy to follow tutorial. Just read the whole post carefully and you will be able to implement android push notification using fcm in your app.
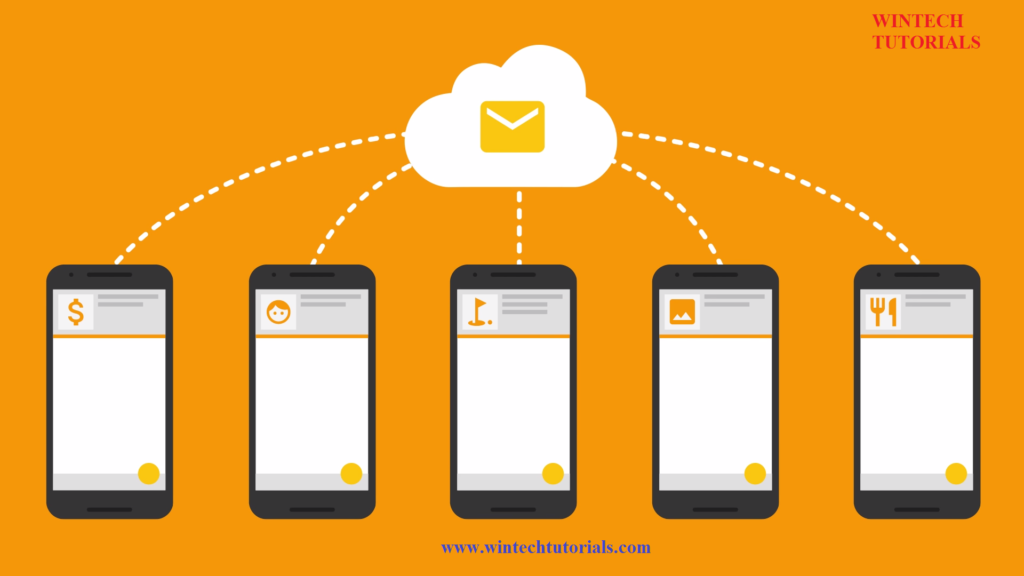
Firebase Cloud Messaging (FCM) is a cross-platform messaging solution that lets you reliably deliver messages at no cost.
Using FCM, you can notify a client app that new email or other data is available to sync. You can send notification messages to drive user reengagement and retention. For use cases such as instant messaging, a message can transfer a payload of up to 4KB to a client app.
Set up Firebase and the FCM SDK
- If you haven’t already, add Firebase to your Android project.
- In Android Studio, add the FCM dependency to your app-level build.gradle file:
dependencies {
      compile 'com.google.firebase:firebase-messaging:10.0.1'
 }
Edit your app manifest
Add the following to your app’s manifest:
- A service that extends FirebaseMessagingService. This is required if you want to do any message handling beyond receiving notifications on apps in the background. To receive notifications in foregrounded apps, to receive data payload, to send upstream messages, and so on, you must extend this service.
<service
     android:name=".MyFirebaseMessagingService">
     <intent-filter>
         <action android:name="com.google.firebase.MESSAGING_EVENT"/>
     </intent-filter>
 </service>
AndroidManifest.xml
- A service that extends FirebaseInstanceIdServiceto handle the creation, rotation, and updating of registration tokens. This is required for sending to specific devices or for creating device groups.
<service
     android:name=".MyFirebaseInstanceIDService">
     <intent-filter>
         <action android:name="com.google.firebase.INSTANCE_ID_EVENT"/>
     </intent-filter>
 </service>
AndroidManifest.xml
- (Optional) Within the application component, metadata elements to set a default icon and color for notifications. Android uses these values whenever incoming messages do not explicitly set icon and icon color.
<!-- Set custom default icon. This is used when no icon is set for incoming notification messages.
      See README(https://goo.gl/l4GJaQ) for more. -->
 <meta-data
     android:name="com.google.firebase.messaging.default_notification_icon"
     android:resource="@drawable/ic_stat_ic_notification" />
 <!-- Set color used with incoming notification messages. This is used when no color is set for the incoming
      notification message. See README(https://goo.gl/6BKBk7) for more. -->
 <meta-data
     android:name="com.google.firebase.messaging.default_notification_color"
     android:resource="@color/colorAccent" />
AndroidManifest.xml
- If FCM is critical to the Android app’s function, be sure to set minSdkVersion 8or higher in the app’s gradle. This ensures that the Android app cannot be installed in an environment in which it could not run properly.
All the above steps are done manually. BUT In latest version of Android Studio i.e. 2.2.1 or above have separate option to do that and in simple manner.
Step by step Tutorial:
Step 1 : Open the Android studio.
Step 2 : Click on New Project option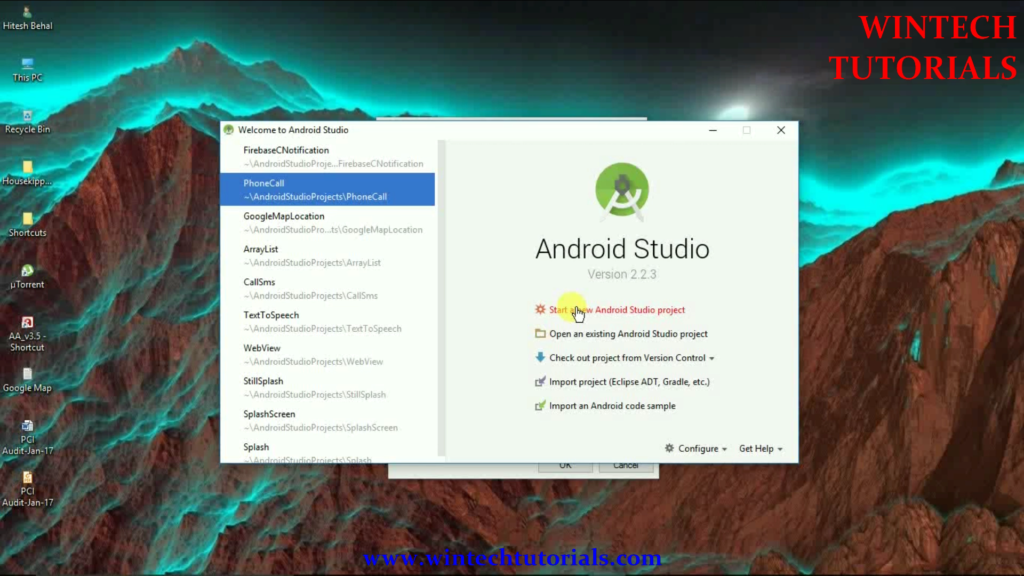
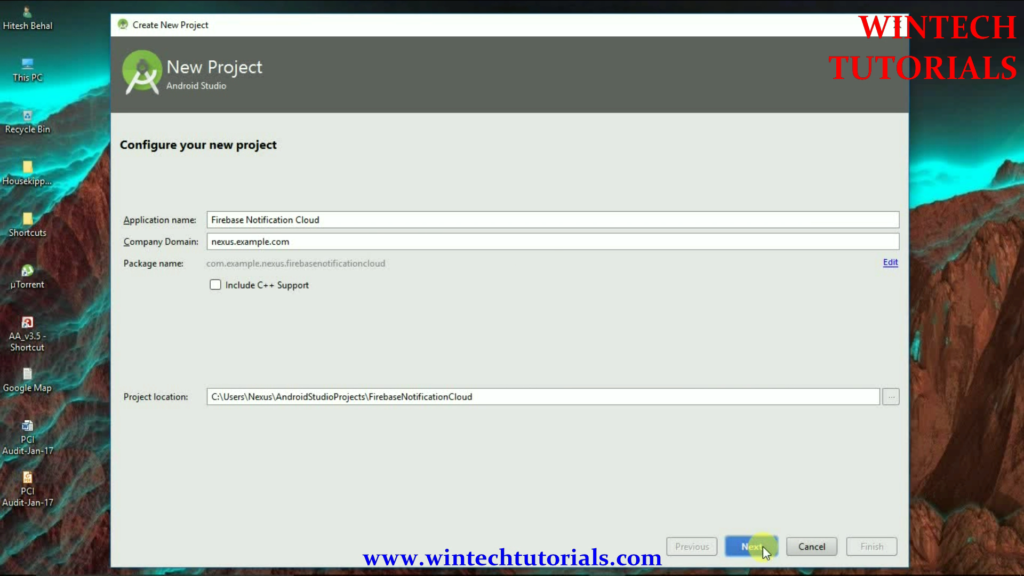
Step 3 : This is called Configure your project where you gibe a name to your project and define you domain. Give the name of your application. (for example: Firebase Notification Cloud). Give the Company domain name or you can leave it as. And give the project location.
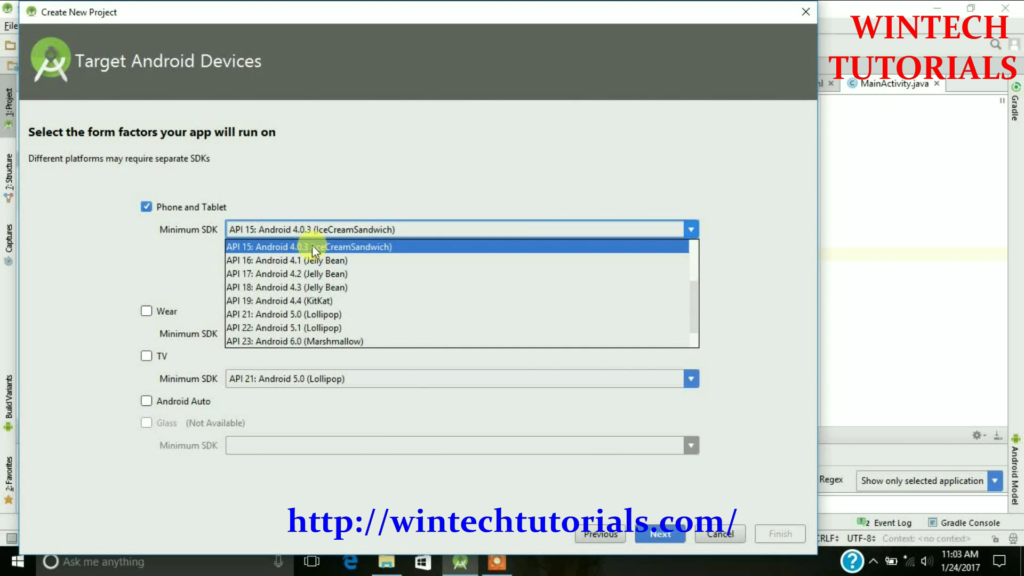
Step 4. After New Project Name Screen there come where you have to choose the particular android version. It implies/ tells us the compatibility of our project in different android platforms. To Study about Available Android Version Click here.
Step 5. In this part you have to select from the provided templates and the result project will be as similar that is displayed on the particular template as follows. It Act as the Main Class of this Project.
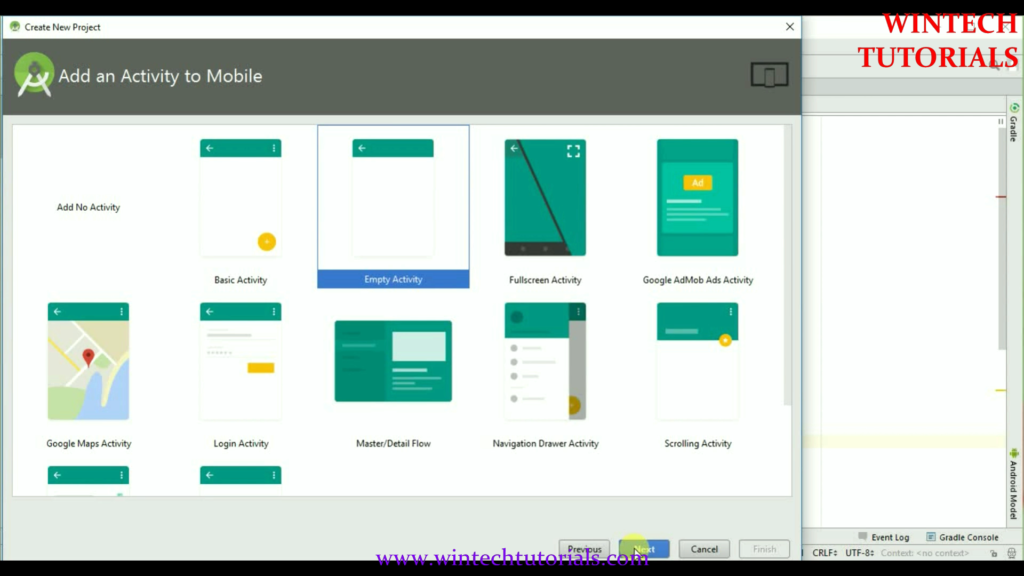
Here we Select the Empty Activity where we can do all the coding.
Step 6. Give Activity Name, Layout Name, and title to selected Activity. In this I name It “MainActivity” and the layout name as “activity_main” as well.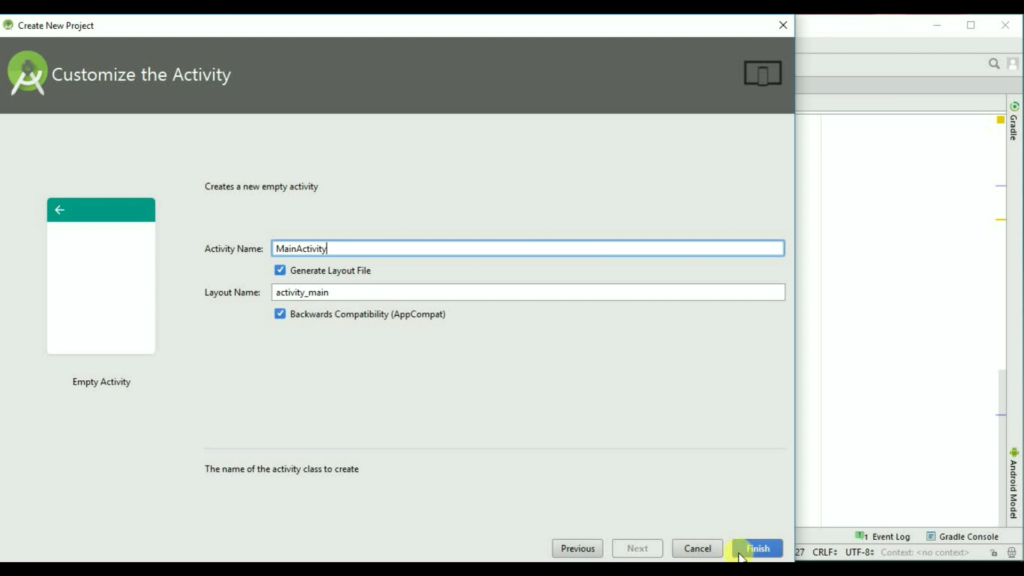
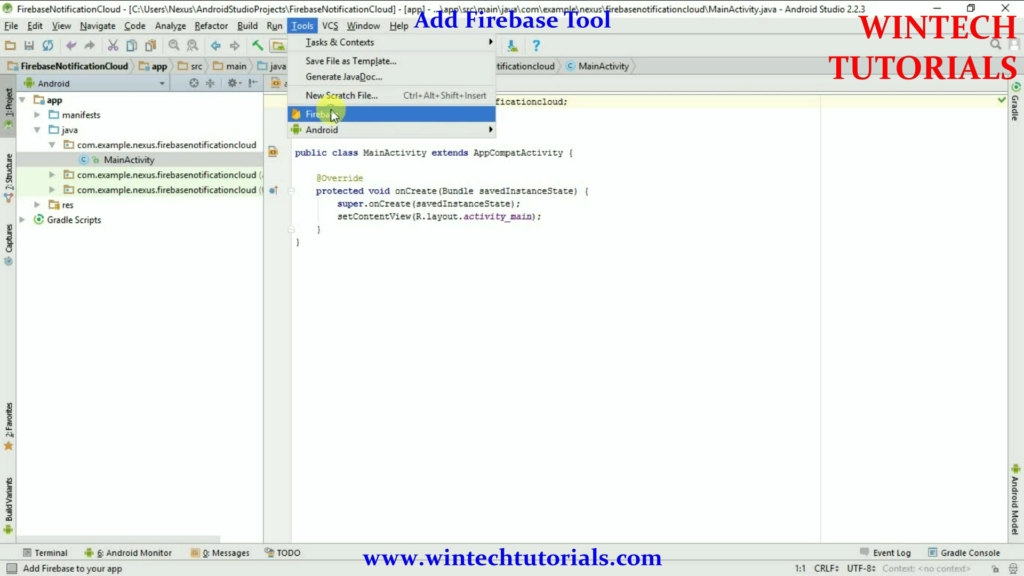
Step 7. After you click on finish button on the last screen then the android will start to build the empty project for you. where you have to design your own layout and implement your own function. once finish it redirect us to the MainActivity.java page. Now GO to
tools–>Firebase
This option is inbuilt and comes with 2.2.1 and above version of Android Studio.
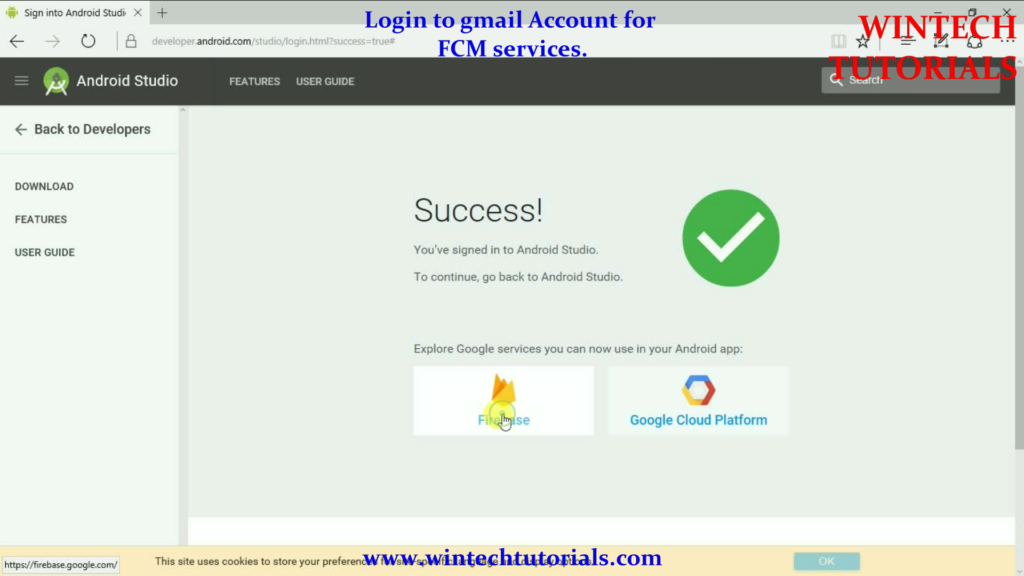
Step 8 Add Firebase to your Account. Now when you click on Firebase then the following Assistance Tab was opened.Here you go to the notification menu and click on Receive notification in your app. after that all the class file and importer are done.
you are redirected to the console part where you have to choose from the platform. i.e Firebase or Google Cloud Platform. once you click on Firebase. go back to your project.
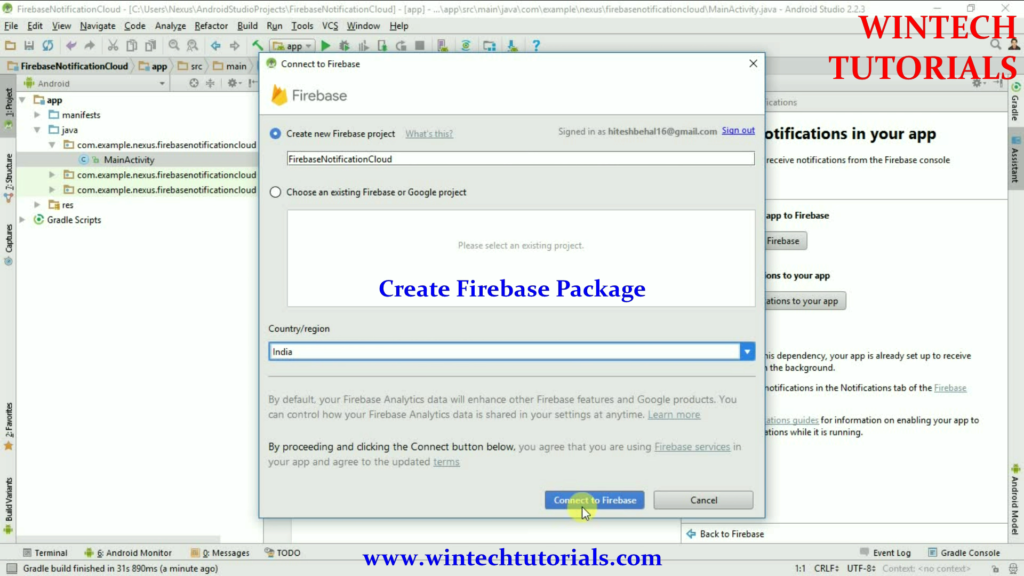
Step 9. Now In here you create a firebase project. you just have to select your Country and Click on Connect to Firebase.
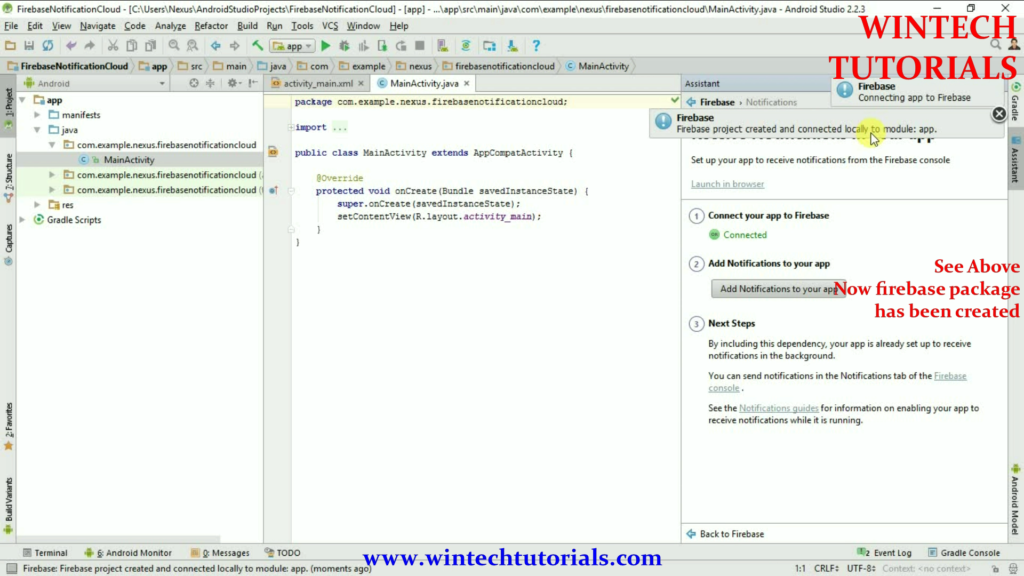
Step 10 Now your project has been connected with the firebase Account and Google API has been update in your project. now next you click on Add Notification to your App.
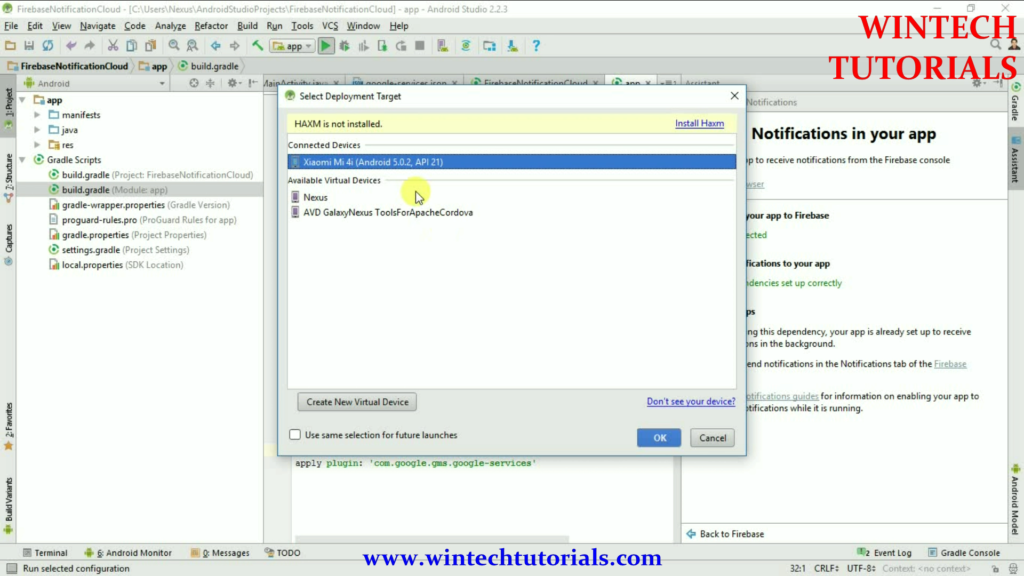
To run the app from Android studio, open one of your project’s activity files and click Run icon from the tool bar. Android studio installs the app on your AVD and starts it and if everything is fine with your set-up and application, it will display following Emulator window –
Here i use the android phone to run the project because Android Emulator takes so much time to process and sometimes it stuck in the process.
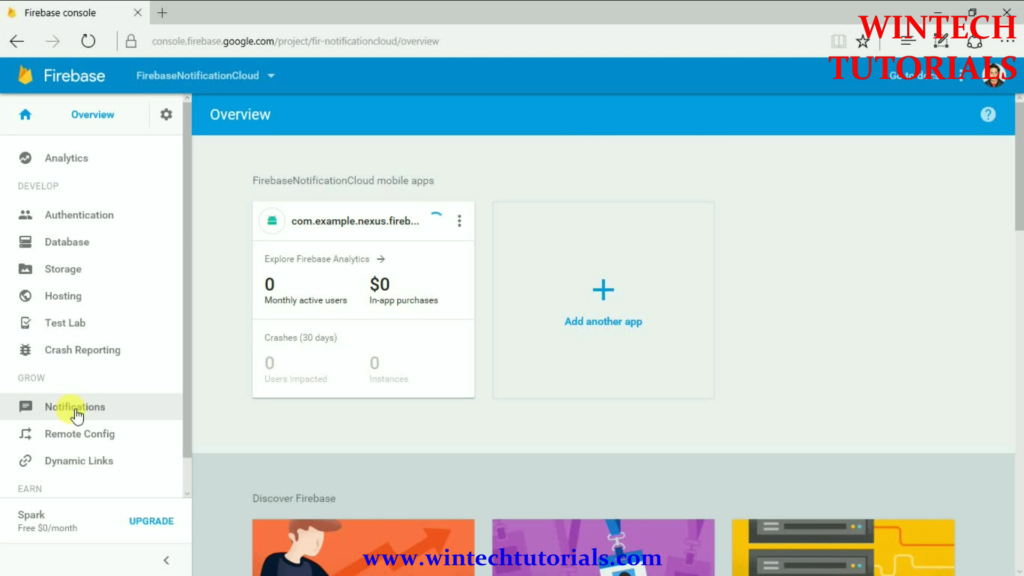
Step 11. once the app has been installed in your phone go to the FIREBASE CONSOLE part where you add notification that can show in you phone.
Step 11. Now click on notification and write your message as follows.
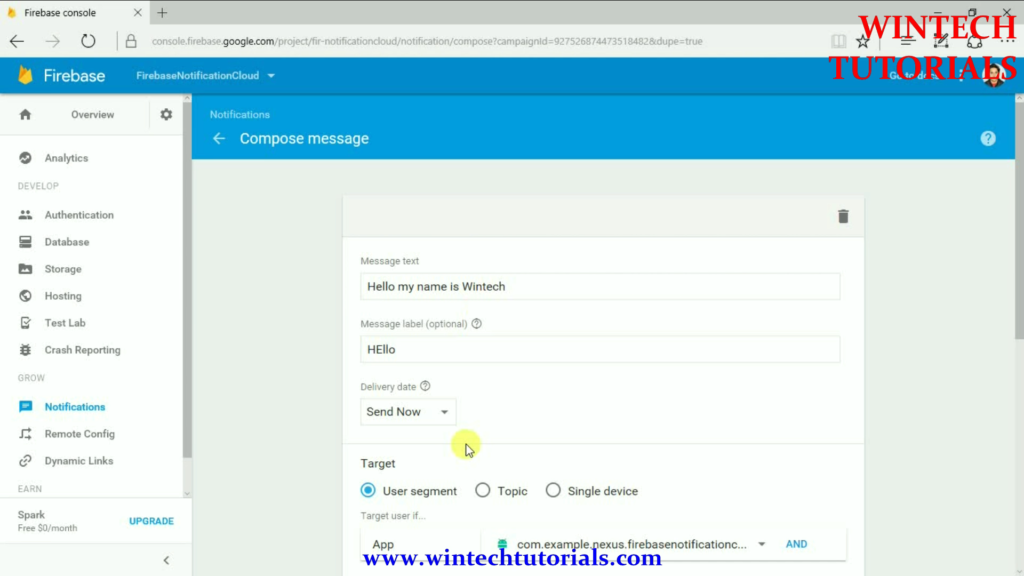
And Click send message. by doing that where ever this app was installed. the notification will appear.
See there no coding part is done . all the work is done by the Android Studio.
google-services has been added and have FCM Key in it to identify the particular app.It Start from ALZA…..
Output:
