
Android Google Map Location
Android Google Map
The Android Google Map Location API allows you to display a Google Map in your Android application. This tutorial shows you how to implement Google Maps API in your Android Application. Initially need to get the API Key from Google cloud console.
Google provides via Google play a library for using Google Maps in your application. The following description is based on the Google Maps Android API which provides significant improvements to the older API version.
The library provides the
com.google.android.gms.maps.MapFragmentclass and theMapViewclass for displaying the map component.
Things you need:
- Android studio
- Java JDK 1.7.3 or above
- SHA1 KEY
- Google account for console part
- Android Phone.
Step by Step Tutorial
Step 1. Create a project with google maps activity as shown below −
Name your project. but make sure that the first latter is in upper case otherwise android Studio not allow you to create any project.
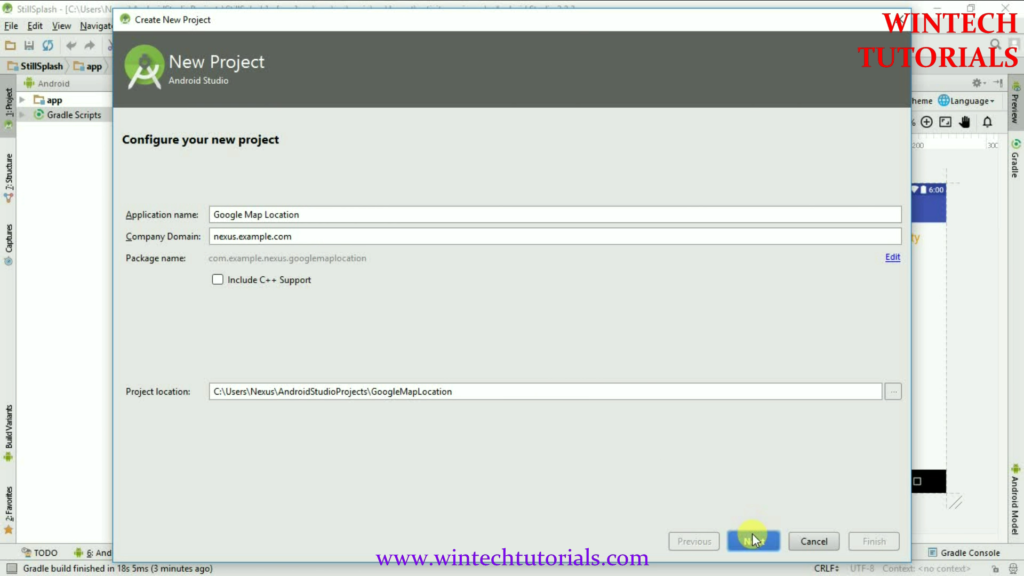
Once you choose the project name then click on next button.
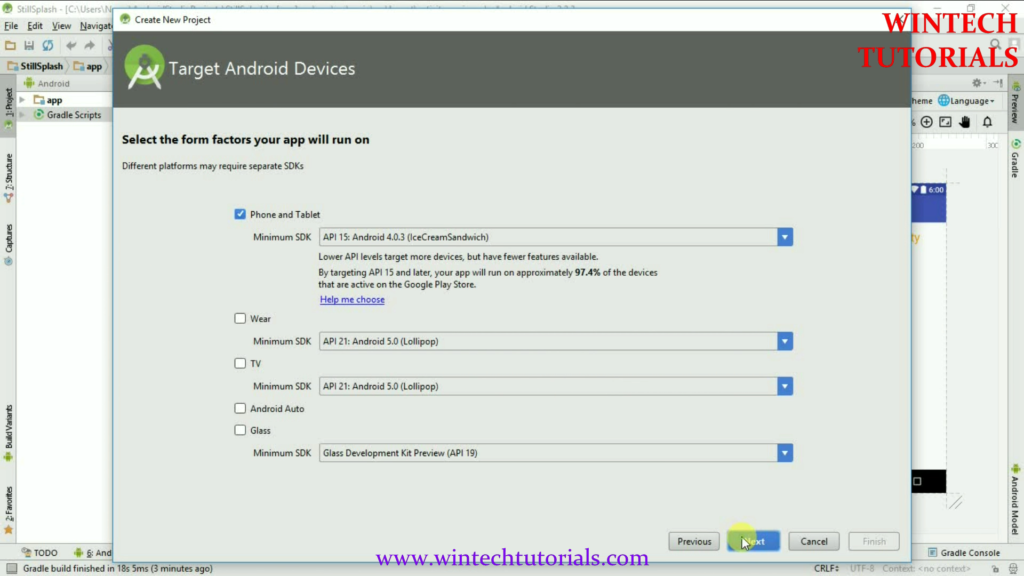
Step 2.After New Project Name Screen there come where you have to choose the particular android version. It implies/ tells us the compatibility of our project in different android platforms.
like:
- Android 3.2 Honeycomb – The first OS design specifically for tablets, launching on the Motorola Xoom
- Android 4.0 Ice Cream Sandwich: The first OS to run on smartphones and tablets, ending the 2.X naming convention.
- Android 4.1 Jelly Bean: Launched on the Google Nexus 7 tablet by Asus
- Android 4.2 Jelly Bean: Arrived on the LG Nexus 4
- Android 4.3 Jelly Bean
- Android 4.4 KitKat: Launched on the LG Nexus 5
- Android 5.0 Lollipop: Launched on the Motorola Nexus 6 and HTC Nexus 9
- Android 6.0 Marshmallow: Launched on the LG Nexus 5X and Huawei Nexus 6P
- Android 7.0 Nougat
The majority of devices that are in the market and had are support android 4.0 and above so if you target 4.0 and above devices that your project will run on 97.4% of devices.
Step 3. In this part you have to select from the provided templates and the result project will be as similar that is displayed on the particular template as follows.
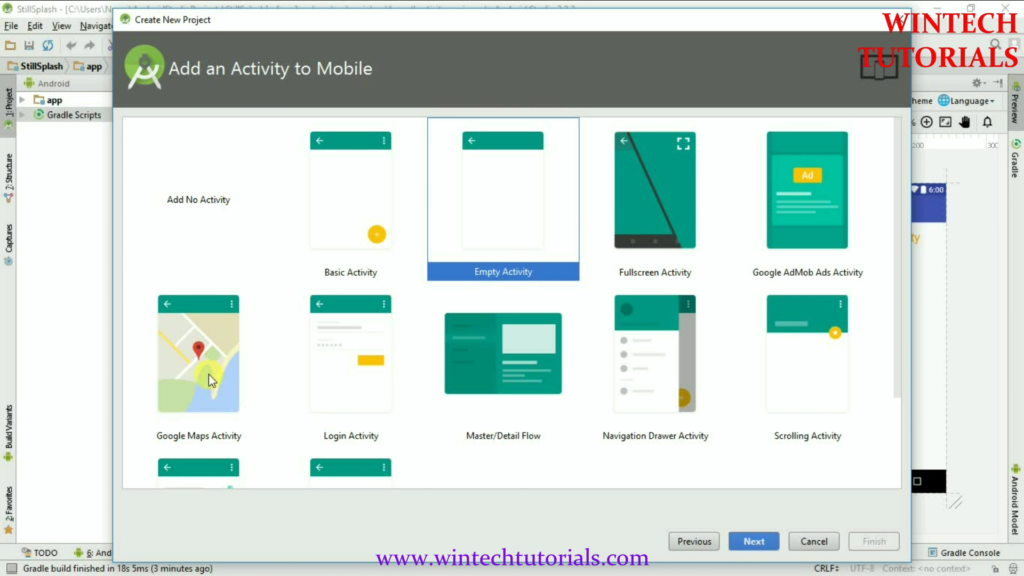
As in this picture you have to choose the Google Map Activity template for this one because we are working on the Google Map. The other reason is the when you choose this template it means all the basic requirement/plugins are automatically import by this. you just need to get the SHA1 Key and Add Permission into the manifest file.this part is in detail.
Step 4 .In this step you are allowed to name you activity. By Default it’s Name is “MainActivity.java” and layout name is “activity_main.xml” this part you can change as you want as show in the picture.
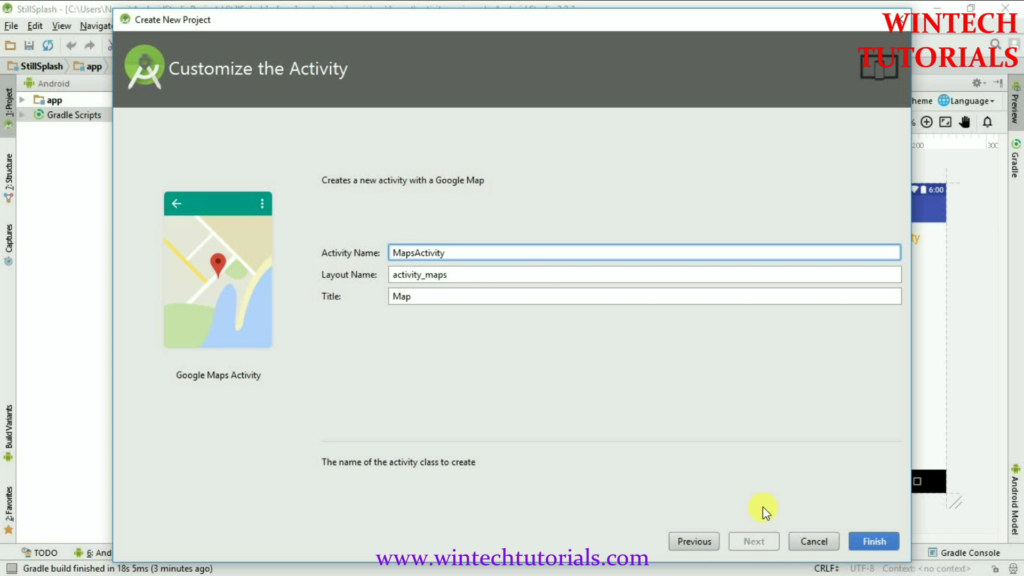
Here my activity is MapActivity. It Act as the MainActivity of this Project.
Step 5. After you click on the finish button the android Studio will start building the project. and once done it direct you to the google_map_api.xml where the nessary information are places. including SHA1 Key and Console.google Address. where you have to create the api key for you project.
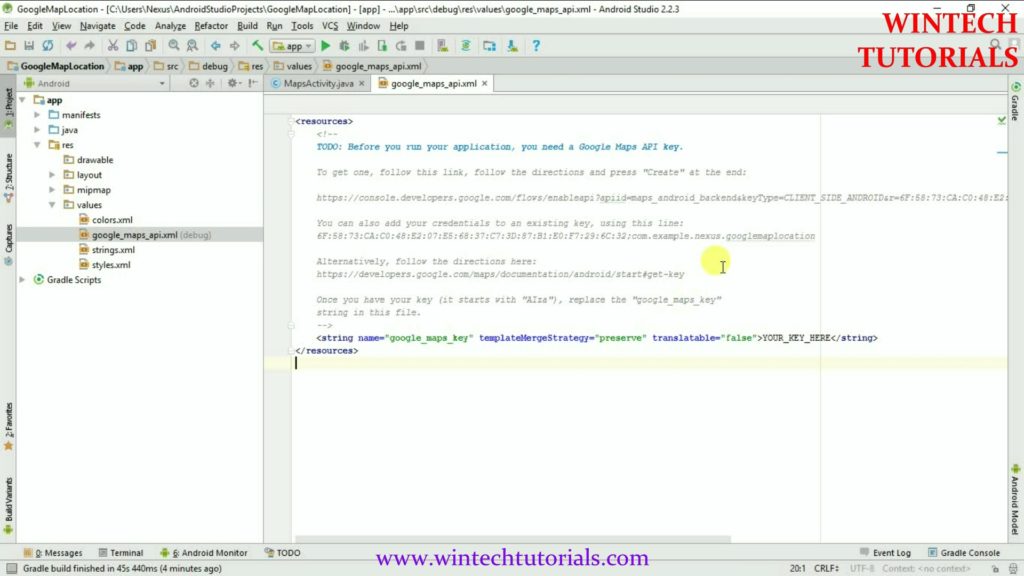
It include all the crucial information. that is the benefit of using then google map template. IF not then you have to get your SHA1 Key using CMD Prompt
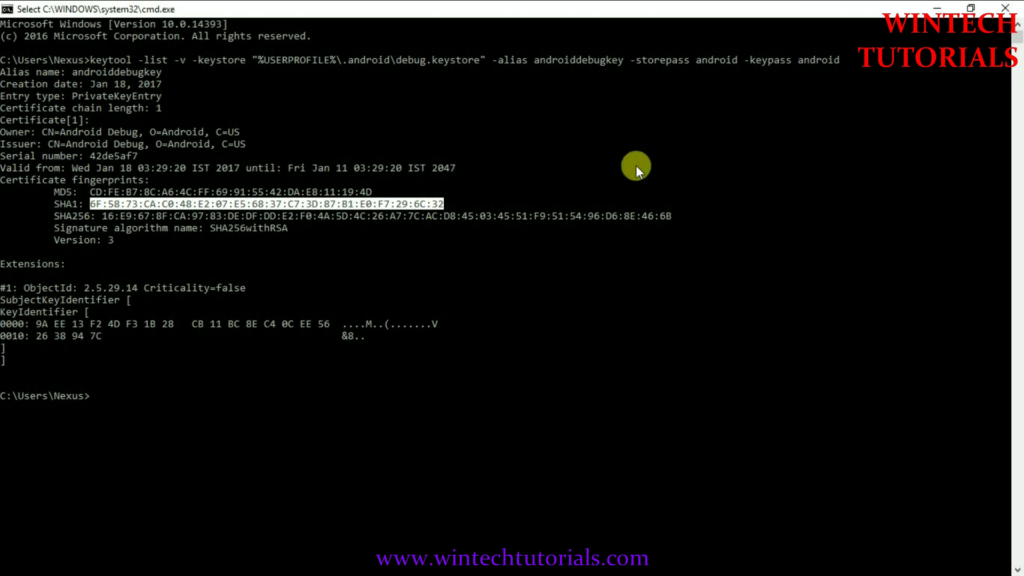
Step 6. SHA1 Key Using CMD Change the directory to the JDK bin directory, mine was jdk1.7.0_05 (could be different for you).
cd C:\Program Files\Java\jdk1.7.0_05\bin
Next we have to run the keytool.exe. Use the following line to get the Android SHA1 fingerprint.
Windows:
keytool -list -v -keystore "%USERPROFILE%\.android\debug.keystore" -alias androiddebugkey -storepass android -keypass android

Mac and Linux:
keytool -list -v -keystore ~/.android/debug.keystore -alias androiddebugkey -storepass android -keypass android
Step 7. Now for the next part you must have the following:
- Internet Access
- Gmail Account
because from now on all the work is done in your gmail account. don’t worry google did’t charge you for this. It is free Service.
https://console.developers.google.com/apis/dashboard?project=extended-medium-156610&duration=PT1H
copy and paste it on the browser and login to you google account if not otherwize you are redirected to the main page as follows.
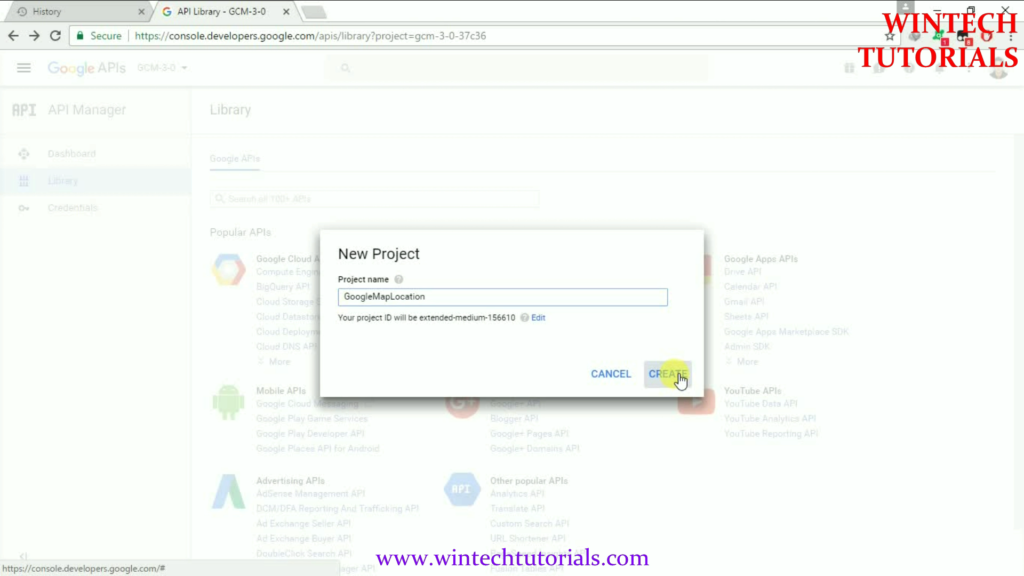
Once you click on CREATE then the following Screen Will Appear.
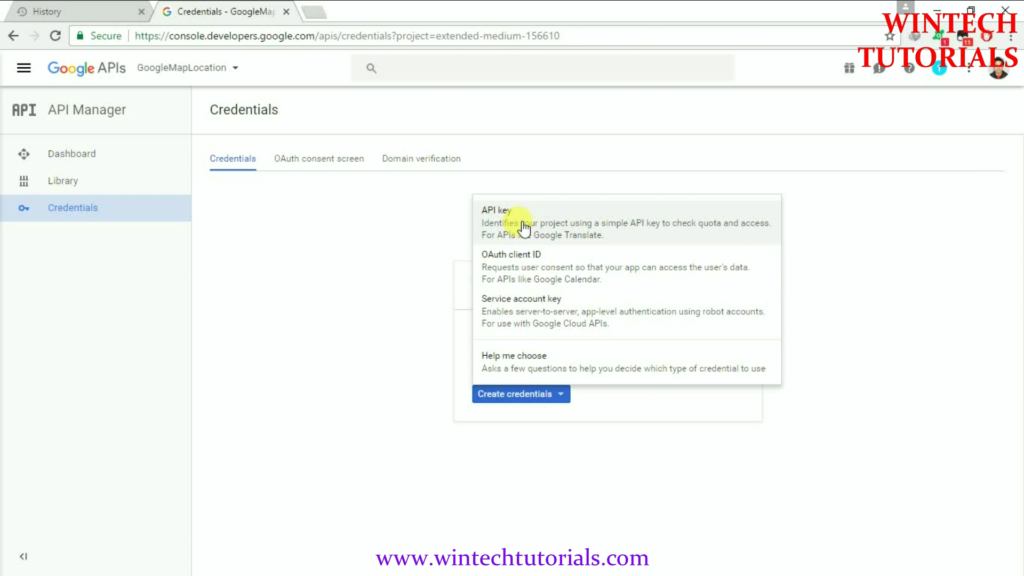
Here we click on API Key under the Credential menu and it will provide us with the API key that must be start from ALZA………
By default it can use publicly. to restrict it to only one application do the follows.
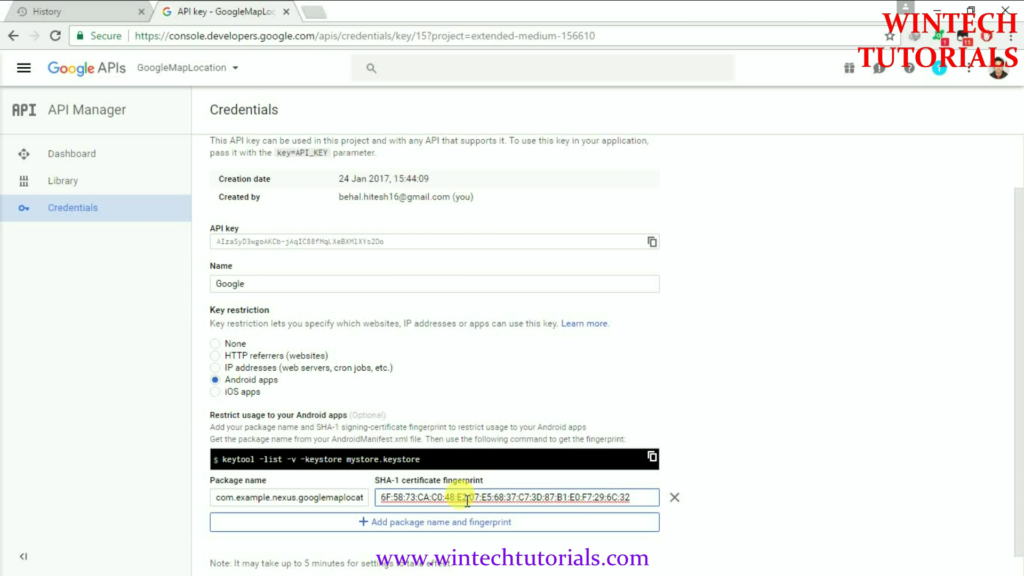
By doing that the API Key is restrict to only one application which package name and SHA1 Key you given now paste that alza key to your project . And that it.
Coding Part:
MapActivity.java
package com.example.nexus.googlemaplocation;
import android.support.v4.app.FragmentActivity;
import android.os.Bundle;
import com.google.android.gms.maps.CameraUpdateFactory;
import com.google.android.gms.maps.GoogleMap;
import com.google.android.gms.maps.OnMapReadyCallback;
import com.google.android.gms.maps.SupportMapFragment;
import com.google.android.gms.maps.model.LatLng;
import com.google.android.gms.maps.model.MarkerOptions;
public class MapsActivity extends FragmentActivity implements OnMapReadyCallback {
private GoogleMap mMap;
@Override
protected void onCreate(Bundle savedInstanceState) {
super.onCreate(savedInstanceState);
setContentView(R.layout.activity_maps);
// Obtain the SupportMapFragment and get notified when the map is ready to be used.
SupportMapFragment mapFragment = (SupportMapFragment) getSupportFragmentManager()
.findFragmentById(R.id.map);
mapFragment.getMapAsync(this);
}
@Override
public void onMapReady(GoogleMap googleMap) {
mMap = googleMap;
// Add a marker in Sydney and move the camera
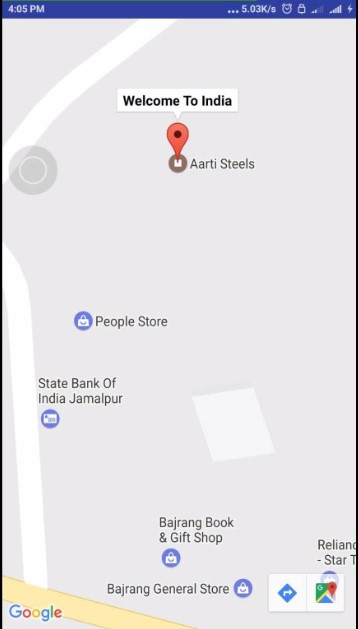
LatLng ludhiana = new LatLng(30.902378, 75.905675);
mMap.addMarker(new MarkerOptions().position(ludhiana).title("Welcome To India"));
mMap.moveCamera(CameraUpdateFactory.newLatLng(ludhiana));
}
}
Activity_map.xml
In this you don’t have to do anything be the code as it.
<fragment xmlns:android="http://schemas.android.com/apk/res/android"
    xmlns:map="http://schemas.android.com/apk/res-auto"
    xmlns:tools="http://schemas.android.com/tools"
    android:id="@+id/map"
    android:name="com.google.android.gms.maps.SupportMapFragment"
    android:layout_width="match_parent"
    android:layout_height="match_parent"
    tools:context="com.example.nexus.googlemaplocation.MapsActivity" />
Google_map_api.xml
In this you have to paste the API key so the it can access the Google Map.
<resources>
       <string name="google_maps_key" templateMergeStrategy="preserve" translatable="false">AIzaSyD3wgoAKCb-jAqIC88fMqLXeBXMlXYs2Do</string>
</resources>
Screen Shoot:
2 thoughts on “Android Google Map Location”
Hi Wintech,
Nice tutorial. I’m looking for a code snippet to add markers to the map dynamically as the user moves in the googlemaps . So far I’ve been able to add static markers only. Ive seen some tutorials, but unfortunately my app crashes.
Any useful link will also help. I’ve seen stackoverflow, any source apart from that would be helpful,as I’m stuck with the code for 2 weeks.
BR,
Shreyasta
To check user movement in map dynamically use onLocationChanged(). Sample code is:-
public void onLocationChanged(Location mlocation) {
if(mlocation!=null){
location = mlocation;
lat = mlocation.getLatitude();
lng = mlocation.getLongitude();
mapFragment.getMapAsync(this);
}
}