
Android CursorAdapter ListView Widget
CursorAdapter
Android provides several subclasses of Adapter that are useful for retrieving different kinds of data and building views for an AdapterView ( i.e. ListView or GridView) Android CursorAdapter and ListView Widget. The common adapters are ArrayAdapter, BaseAdapter, CursorAdapter, SimpleCursorAdapter, SpinnerAdapter and WrapperListAdapter.
Adapter that exposes data from a Cursor to ListView widget is called CursorAdapter. The Cursor must include a column named “_id” otherwise this class will not work.
ListView Widget
A view that shows items in a vertically scrolling list is called ListView. The items come from the ListAdapter associated with this view. Android ListView is a view which groups several items and display them in vertical scrollable list. The list items are automatically inserted to the list using an Adapter that pulls content from a source such as an array or database.
Creating Project
In this tutorial I going to make a project using ListView view widget and CursorAdapter. In my previous tutorial (SQLite Database in Android App – Tutorial) I show you How to make a SQLite Database in Android App. Before going further in this tutorial please take a look on my previous tutorial.
Step by Step Tutorial
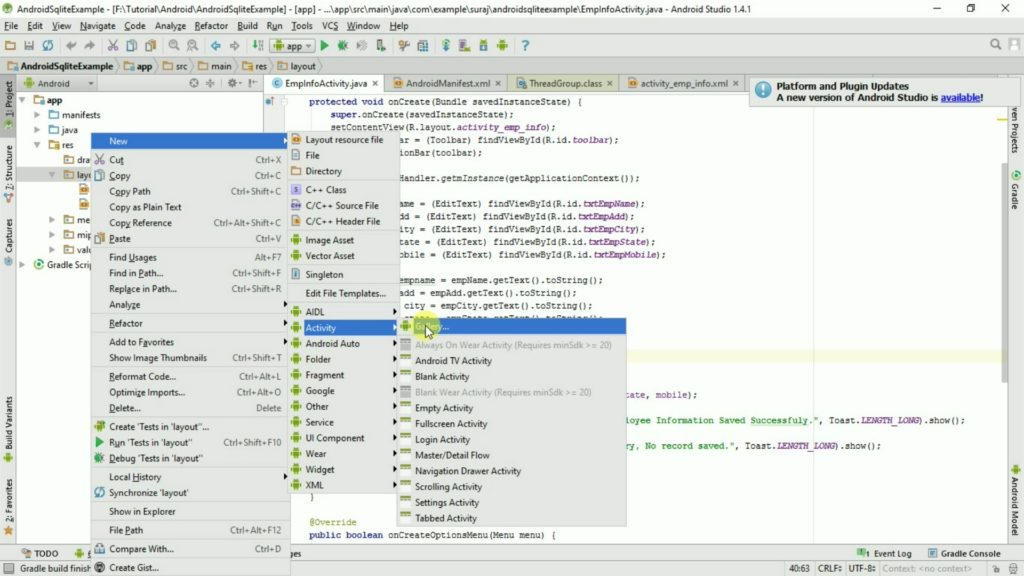
Step 1: Going further with my previous tutorial. Firstly I create a new activity with the name of EmpListActivity.js
So Right click on Layout => New => Gallery
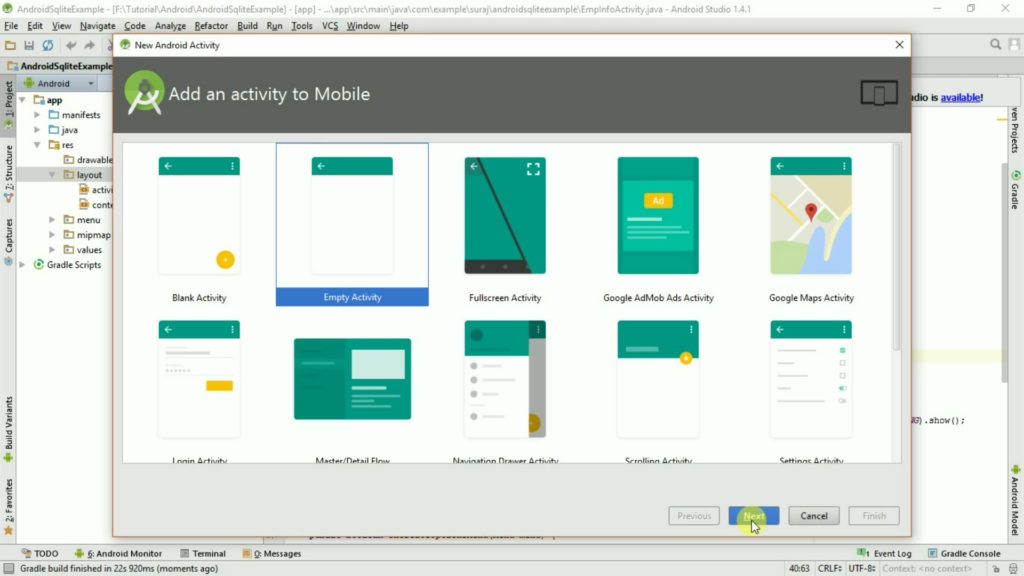
Step 2: Select Empty Activity from given templates in gallery and click on Next Button.
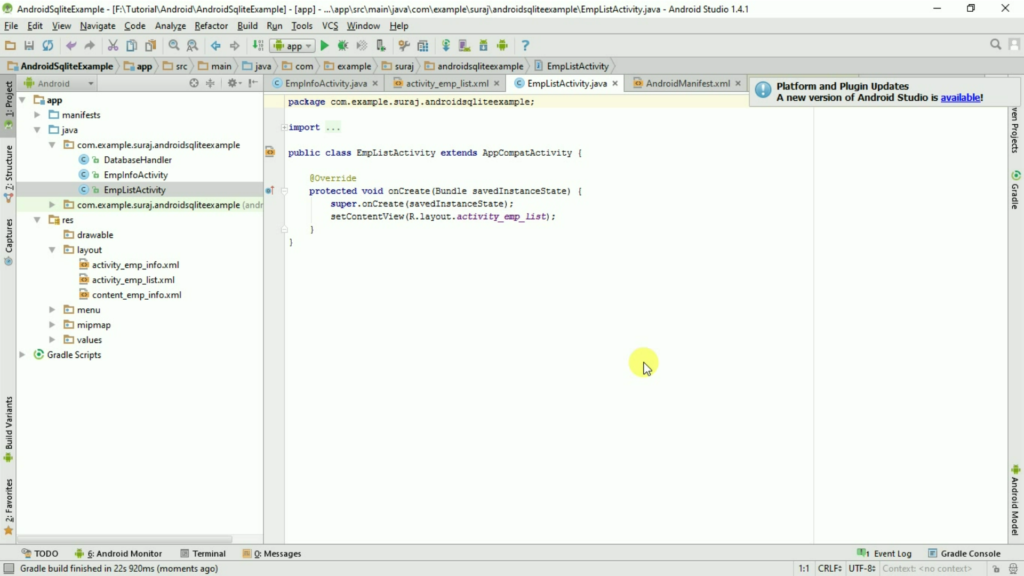
Step 3: Give the Name to Empty Activity (Like I give EmpListActivity) and click on Finish Button.

Step 4: Now as per image there is a new java class file named EmpListActivity and a new Layout file named activity_emp_list.xml
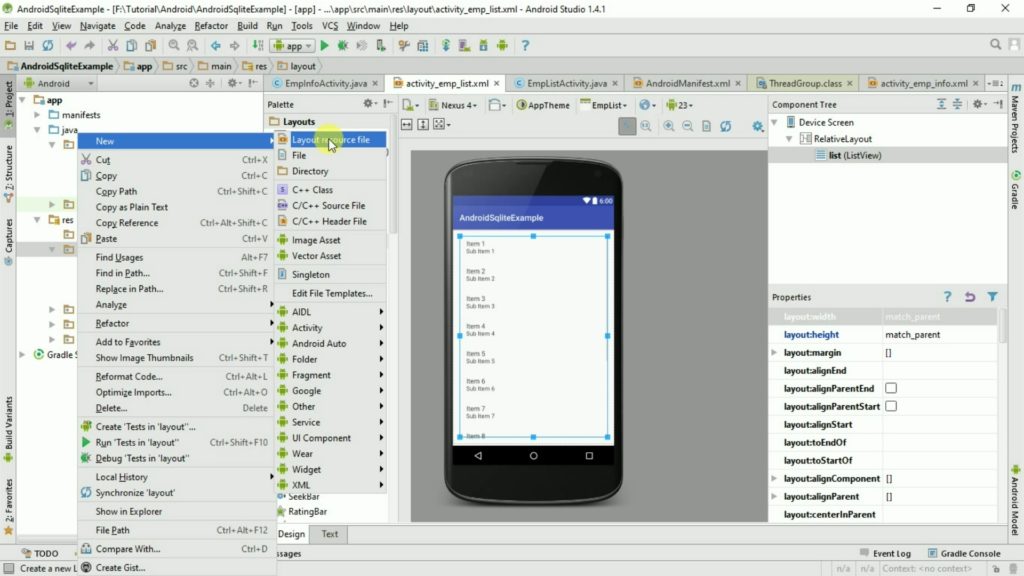
Step 5: Now add ListView widget in activity_emp_list.xml file as below mentioned:
<ListView android:id="@+id/list" android:layout_width="match_parent" android:layout_height="match_parent"/>
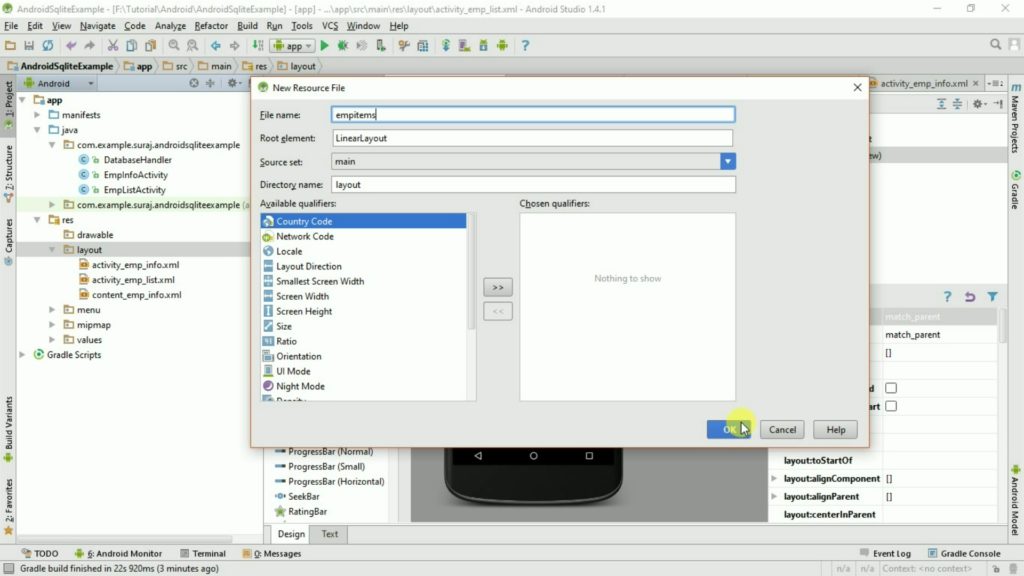
Step 6: Now add a new resource layout file which will content the items of ListView widget.
Step 7: Give the name to this new Resource Layout File and click on OK Button.
Step 8: Add TextView control in new Resource layout file. As below mentioned:
<TextView android:id="@+id/txtEmpName"
 android:layout_width="match_parent" android:textColor="@color/colorPrimaryDark"
 android:layout_height="wrap_content" />
Step 9: Now goto your new EmpListActivity java class file and declare DatabaseHandler file into onCreate() Method. And Also declare the object of ListView Widget. Like:
private DatabaseHandler db;
db =DatabaseHandler.getmInstance(getApplicationContext());
ListView mListView = (ListView) findViewById(R.id.list);
Step 10: Now create a Cursor in DatabaseHandler.java file.
public Cursor getEmpList(){
 SQLiteDatabase db   = this.getWritableDatabase();
 String query = "Select ID _id, EmpName from EmpInfo";
 Cursor cursor = db.rawQuery(query, null);
 return  cursor;
 }
Step 11: After Create Cursor in DatabaseHandler file now call the cursor in EmpListActivity java class file.
Cursor cursor = db.getEmpList();
 if(cursor!=null){
 //We will code to fill setAdapter into ListView here.

}
Step 12: Now create a CursorAdapter Class file which fetch the record from Cursor and set the value into TextView.
So Right Click on your Package name in Java Folder => New => Java Class
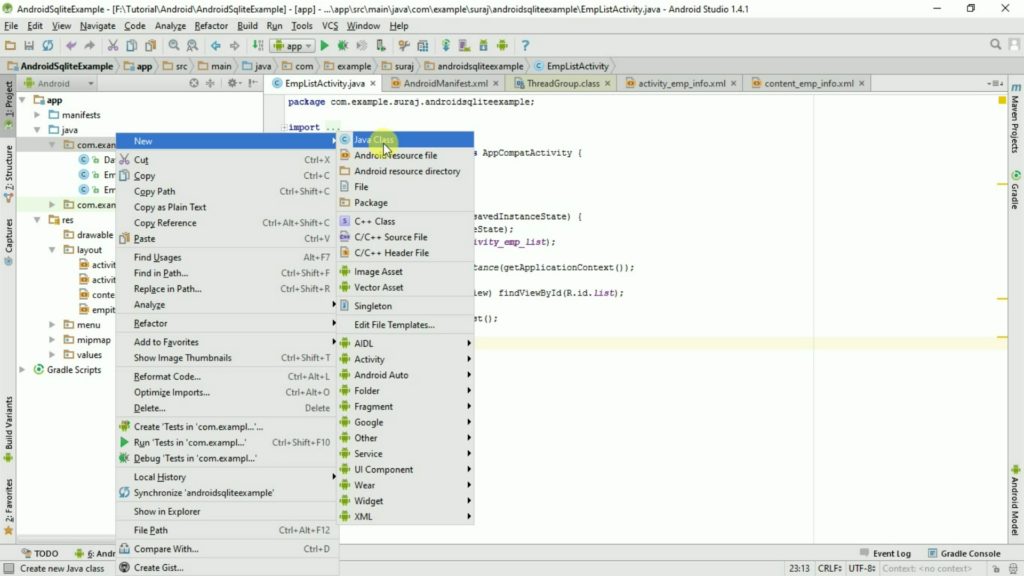
Step 13: Give the name to this new Java class file like I given: EmpListAdapter
Step 14: Now do the following code into your new class file. And debug your code.
public class EmpListAdapter extends CursorAdapter {

public EmpListAdapter(Context context, Cursor cursor, int flag){

super(context, cursor, 0);
}

public void bindView(View view, Context context, Cursor cursor){

TextView txtEmpName = (TextView) view.findViewById(R.id.txtEmpName);

String EmpName = cursor.getString(cursor.getColumnIndex("EmpName"));

txtEmpName.setText(EmpName);

}

public View newView(Context context, Cursor cursor, ViewGroup parent){
return LayoutInflater.from(context).inflate(R.layout.empitems, parent,false);
}
}
Step 14: Now your code is ready to debug. press Shift+F10 or click on Run icon in toolbar. select the emulator or device and you will get screen like this.

Full Source Code
EmpListAdapter
public class EmpListAdapter extends CursorAdapter {

public EmpListAdapter(Context context, Cursor cursor, int flag){

super(context, cursor, 0);
 }

public void bindView(View view, Context context, Cursor cursor){

TextView txtEmpName = (TextView) view.findViewById(R.id.txtEmpName);

String EmpName = cursor.getString(cursor.getColumnIndex("EmpName"));

txtEmpName.setText(EmpName);

}

public View newView(Context context, Cursor cursor, ViewGroup parent){
 return LayoutInflater.from(context).inflate(R.layout.empitems, parent,false);
 }
 }
EmpListActivity
public class EmpListActivity extends AppCompatActivity {

private DatabaseHandler db;
 private EmpListAdapter empListAdapter;
 @Override
 protected void onCreate(Bundle savedInstanceState) {
 super.onCreate(savedInstanceState);
 setContentView(R.layout.activity_emp_list);

db =DatabaseHandler.getmInstance(getApplicationContext());

ListView mListView = (ListView) findViewById(R.id.list);

Cursor cursor = db.getEmpList();
 if(cursor!=null){
 empListAdapter = new EmpListAdapter(getApplicationContext(), cursor, 0);
 mListView.setAdapter(empListAdapter);
 }

}
 }
DatabaseHandler.java
import android.content.ContentValues;
 import android.content.Context;
 import android.database.Cursor;
 import android.database.sqlite.SQLiteDatabase;
 import android.database.sqlite.SQLiteOpenHelper;

import java.text.SimpleDateFormat;
 import java.util.Date;
 import java.util.Locale;

public class DatabaseHandler extends SQLiteOpenHelper {

private static final int DatabaseVersion=1;
 private static final String DatabaseName="db_testSql";
 private static final String CreateTable_EmpInfo="Create Table EmpInfo(ID Integer Primary Key AutoIncrement,EmpName Text, Address Text,City Text, State Text, Mobile Text, CreatedOn DateTime)";

private static  DatabaseHandler mInstance = null;
 public static DatabaseHandler getmInstance(Context context){
 if(mInstance==null){
 mInstance = new DatabaseHandler(context.getApplicationContext());
 }
 return mInstance;
 }

public DatabaseHandler(Context context){
 super(context, DatabaseName, null, DatabaseVersion);
 }
 @Override
 public  void onCreate(SQLiteDatabase db){
 db.execSQL(CreateTable_EmpInfo);
 }
 @Override
 public  void onUpgrade(SQLiteDatabase db, int oldVersion, int newVersion){
 onCreate(db);
 }

//To Get Current Datetime //
 private String getDateTime(){
 SimpleDateFormat dateFormat = new SimpleDateFormat("yyyy-MM-dd HH:mm:ss", Locale.getDefault() );
 Date date= new Date();
 return  dateFormat.format(date);
 }
 //Insert Record in EmpInfo Table //
 public long insertIntoEmpInfo(String EmpName, String Address, String City, String State, String Mobile){

SQLiteDatabase db = this.getWritableDatabase();

ContentValues values = new ContentValues();
 values.put("EmpName",EmpName);
 values.put("Address",Address);
 values.put("City",City  );
 values.put("State",State);
 values.put("Mobile",Mobile);
 values.put("CreatedOn",getDateTime());

long id = db.insert("EmpInfo",null,values);

return id;
 }

public Cursor getEmpList(){
 SQLiteDatabase db   = this.getWritableDatabase();
 String query = "Select ID _id, EmpName from EmpInfo";
 Cursor cursor = db.rawQuery(query, null);
 return  cursor;

}

}
activity_emp_list.xml
<?xml version="1.0" encoding="utf-8"?>
 <RelativeLayout xmlns:android="http://schemas.android.com/apk/res/android"
 xmlns:tools="http://schemas.android.com/tools" android:layout_width="match_parent"
 android:layout_height="match_parent" android:paddingLeft="@dimen/activity_horizontal_margin"
 android:paddingRight="@dimen/activity_horizontal_margin"
 android:paddingTop="@dimen/activity_vertical_margin"
 android:paddingBottom="@dimen/activity_vertical_margin"
 tools:context="com.example.suraj.androidsqliteexample.EmpListActivity">

<ListView android:id="@+id/list" android:layout_width="match_parent" android:layout_height="match_parent"/></RelativeLayout>

empitems.xml

<?xml version="1.0" encoding="utf-8"?>
 <LinearLayout xmlns:android="http://schemas.android.com/apk/res/android"
 android:orientation="vertical" android:layout_width="match_parent"
 android:layout_height="match_parent">

<TextView android:id="@+id/txtEmpName"
 android:layout_width="match_parent" android:textColor="@color/colorPrimaryDark"
 android:layout_height="wrap_content" />

</LinearLayout>
One thought on “Android CursorAdapter ListView Widget”