
Android Animated Splash Screen
Animated Splash Screen
Many popular Android Apps such as Skype, Facebook, Adobe Reader, 500px, Dropbox etc., uses Android Animated Splash Screen to display their logo. Most Android Apps uses Android Splash Screen before launching application Activity. Android splash screen is used to display a logo or brand for an app. It appears only for couple of second as you mentioned in your .java file in android studio
PURPOSE:
Splash screens are typically used by particularly large applications to notify the user that the program is in the process of loading. They provide feedback that a lengthy process is underway. Occasionally, a progress bar within the splash screen indicates the loading progress. A splash screen disappears when the application’s main window appears.
Splash screens typically serve to enhance the look and feel of an application or web site, hence they are often visually appealing. They may also have animations, graphics, and sound.
Android Animated Splash Screen Using Timer
This is same as the Previous Tutorial. The different here is that in this tutorial I Uses the Animated concept where the splash screen icon will appear from bottom and stop in the center and after dedicated time interval other activity will appear.
In this tutorial I show you how to add Animated Splash Screen to your Android Application using Android Studio. You can add this Splash Screen either to existing Android Studio Project or New Android Studio Project.
Step by step Tutorial:
Step 1 : Open the Android studio.
Step 2 : Click on New Project option
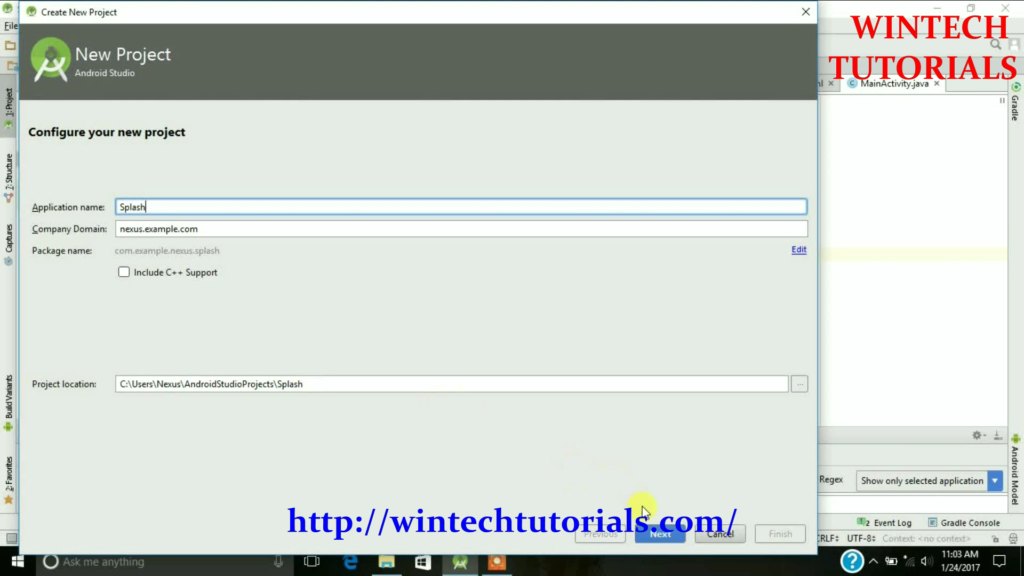
Step 3 : This is called Configure your project where you gibe a name to your project and define you domain. Give the name of your application. (for example: Splash). Give the Company domain name or you can leave it as. And give the project location.
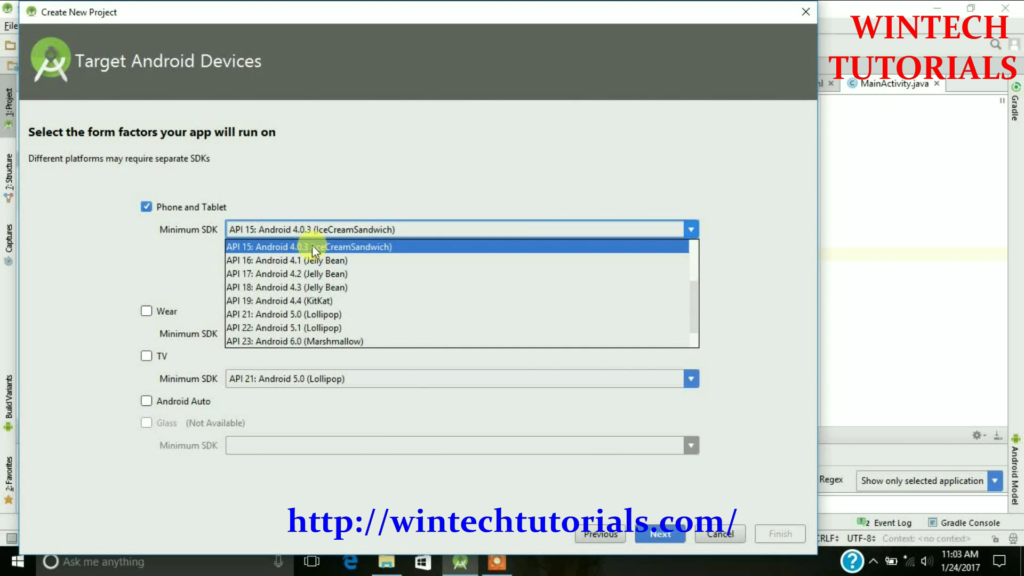
Step 4. After New Project Name Screen there come where you have to choose the particular android version. It implies/ tells us the compatibility of our project in different android platforms. To Study about Available Android Version Click here.
Step 5. In this part you have to select from the provided templates and the result project will be as similar that is displayed on the particular template as follows. It Act as the Main Class of this Project.
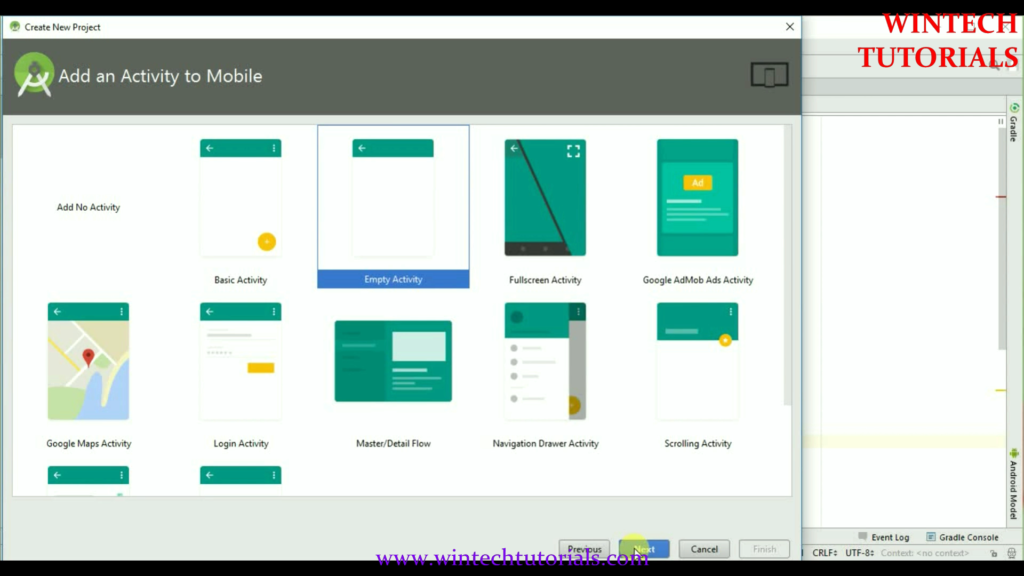
Here we Select the Empty Activity where we can do all the coding.
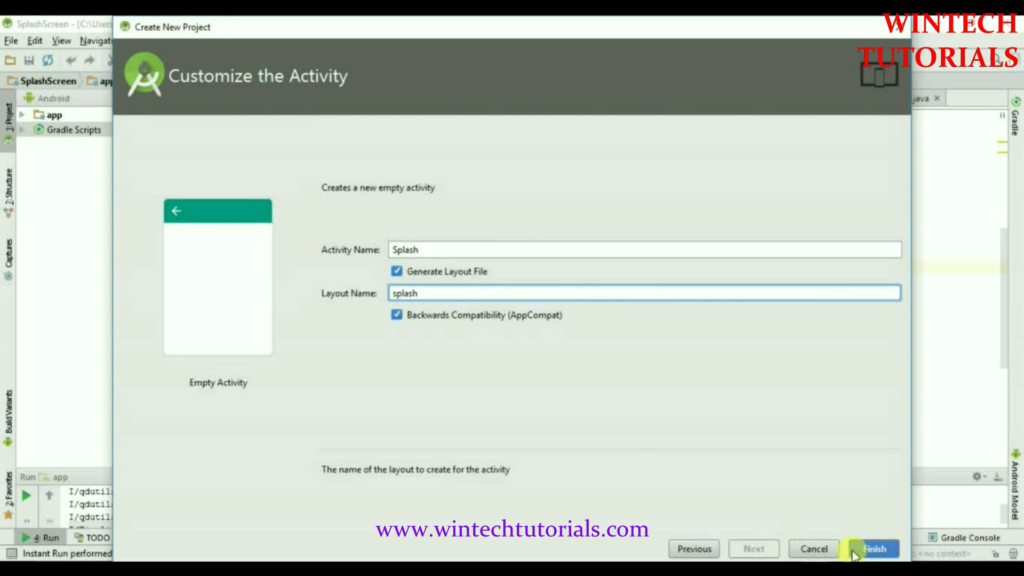
Step 6. Give Activity Name, Layout Name, and title to selected Activity. In this I name It “Splash” and the layout name as “splash” as well.
Step 7. After you click on finish button on the last screen then the android will start to build the empty project for you. where you have to design your own layout and implement your own function. once finish it redirect us to the Splash.java page. where all the coding part is done.
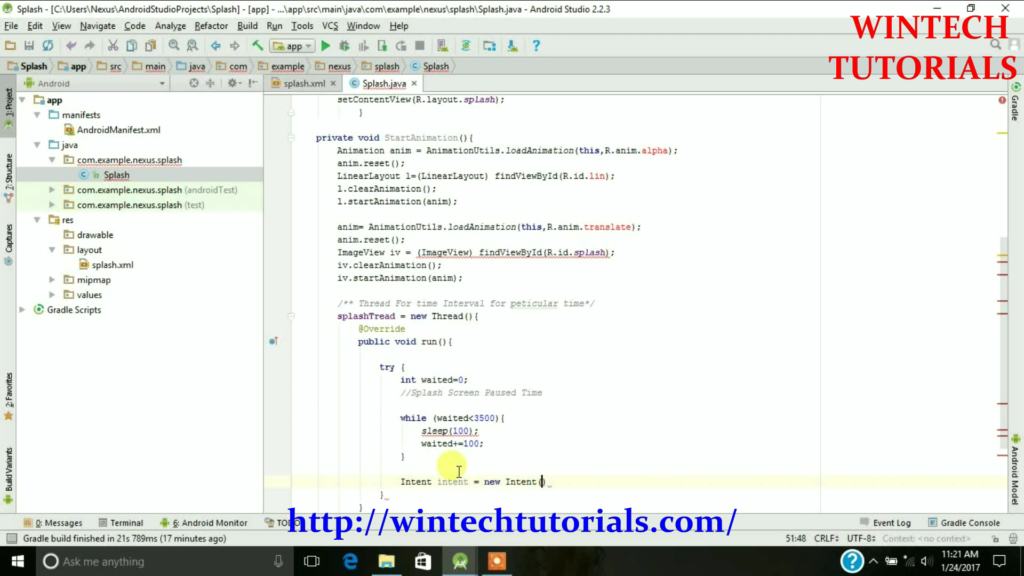
In this Code we use Splash Time Out 3000 means 3 Seconds.
 public void run() {
 try {
 int waited = 0;
 // Splash screen pause time
 while (waited < 3500) {
 sleep(100);
 waited += 100;
 }
 Intent intent = new Intent(Splash.this,
 MainActivity.class);
 intent.setFlags(Intent.FLAG_ACTIVITY_NO_ANIMATION);
 startActivity(intent);
here Intent is used for to start an another Activity i.e MainActivity. so after 3 Seconds MainActivity will appear Automatically
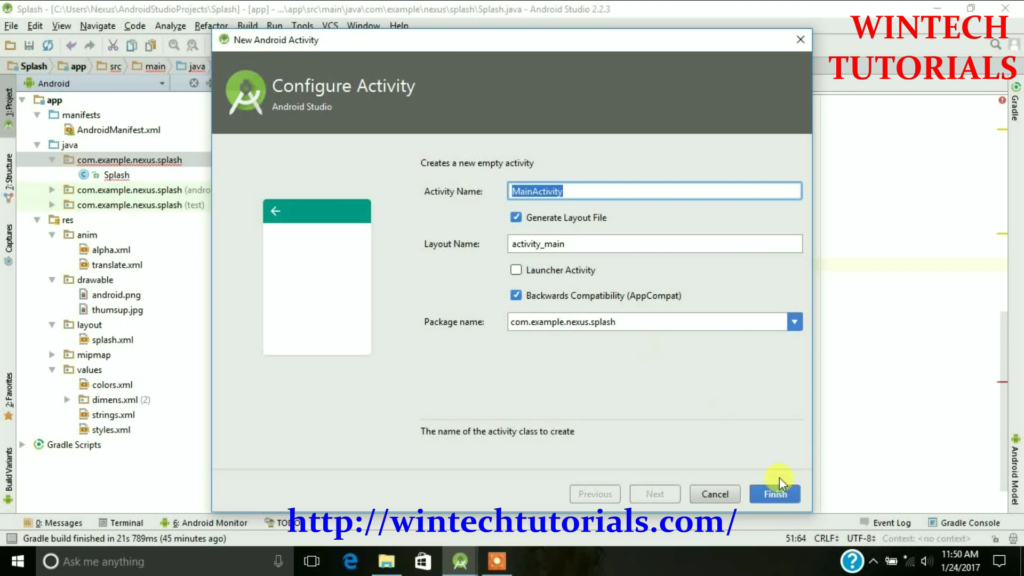
Step 8. Now we need an another Activity so that after specified time interval it directly goes to that Activity
Step 9. Now I am working on the Layout part where we add image for attraction so that the image still on the screen for 3 Second(My code) and after that other activity will open. in this an image and text is added.
 Now Open File Explorer in your Operating System and paste the image you want to use C:\Users\UserName\AndroidStudioProjects\AndroidSplashScreenExample\app\src\main\res\drawable) . Advisable Image size is 800 x 1280 pixels and format is jpeg or png. Make sure that you named the image using small letters and underscores without using Special Symbols. I named it as android.
Here we use a image file with .png extension so that there will be no background.
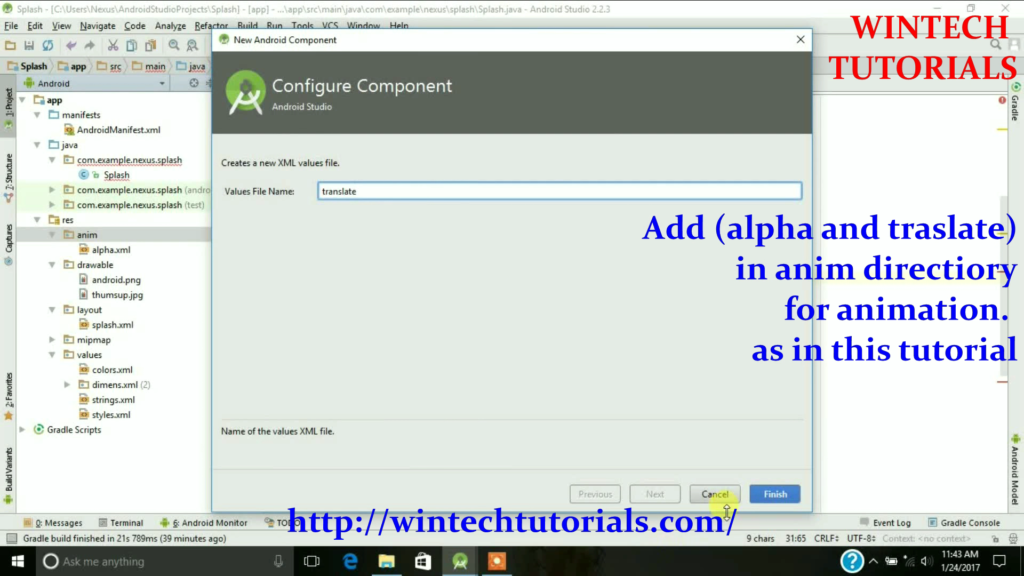
Step 10 Now we have to work on the Animated part. That’s why we use “alpha” and “Translate” under the anim. which is used for animation process.
Code:
private void StartAnimations() {
 Animation anim = AnimationUtils.loadAnimation(this, R.anim.alpha);
 anim.reset();
 LinearLayout l=(LinearLayout) findViewById(R.id.lin);
 l.clearAnimation();
 l.startAnimation(anim);

anim = AnimationUtils.loadAnimation(this, R.anim.translate);
 anim.reset();
 ImageView iv = (ImageView) findViewById(R.id.splash);
 iv.clearAnimation();
 iv.startAnimation(anim);
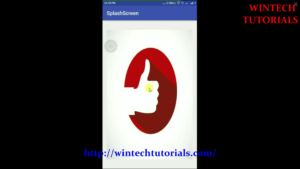
Step 11. Now go to the activity_main.xml where I use an image file so that when the times up it display that image in the mainactivity.java file.
To run the app from Android studio, open one of your project’s activity files and click Run icon from the tool bar. Android studio installs the app on your AVD and starts it and if everything is fine with your set-up and application, it will display following Emulator window –
Here i use the android phone to run the project because Android Emulator takes so much time to process and sometimes it stuck in the process.
process to run Android project in android phone directly via USB Cable
1. Install the drivers of you phone known as MTP(MEDIA TRANSPORT PROTOCOL) from official site.
2.Enable Development mode through 7 times click on version under About Phone Setting.
3.Now open development mode and enable the usb debugging.
that’s it now your android studio automatically pick your mobile details. until unless the android SDK is not correctly installed.
Coding:
AndroidManifest.xml
<?xml version="1.0" encoding="utf-8"?>
<manifest xmlns:android="http://schemas.android.com/apk/res/android"
 package="com.example.nexus.splash">

<application
 android:allowBackup="true"
 android:icon="@mipmap/ic_launcher"
 android:label="@string/app_name"
 android:supportsRtl="true"
 android:theme="@style/AppTheme">
 <activity android:name=".Splash">
 <intent-filter>
 <action android:name="android.intent.action.MAIN" />

<category android:name="android.intent.category.LAUNCHER" />
 </intent-filter>
 </activity>
 <activity android:name=".MainActivity"></activity>
 </application>

</manifest>
Splash.java
package com.example.nexus.splash;

import android.app.Activity;
import android.content.Intent;
import android.graphics.PixelFormat;
import android.support.v7.app.AppCompatActivity;
import android.os.Bundle;
import android.view.Window;
import android.view.animation.Animation;
import android.view.animation.AnimationUtils;
import android.widget.ImageView;
import android.widget.LinearLayout;

public class Splash extends Activity {
 public void onAttachedToWindow() {
 super.onAttachedToWindow();
 Window window = getWindow();
 window.setFormat(PixelFormat.RGBA_8888);
 }
 /** CAlled When The Activity Is first Created*/
 Thread splashTread;
 @Override
 public void onCreate(Bundle savedInstanceState) {
 super.onCreate(savedInstanceState);
 setContentView(R.layout.splash);
 StartAnimations();
 }
 private void StartAnimations() {
 Animation anim = AnimationUtils.loadAnimation(this, R.anim.alpha);
 anim.reset();
 LinearLayout l=(LinearLayout) findViewById(R.id.lin);
 l.clearAnimation();
 l.startAnimation(anim);

anim = AnimationUtils.loadAnimation(this, R.anim.translate);
 anim.reset();
 ImageView iv = (ImageView) findViewById(R.id.splash);
 iv.clearAnimation();
 iv.startAnimation(anim);

splashTread = new Thread() {
 @Override
 public void run() {
 try {
 int waited = 0;
 // Splash screen pause time
 while (waited < 3500) {
 sleep(100);
 waited += 100;
 }
 Intent intent = new Intent(Splash.this,
 MainActivity.class);
 intent.setFlags(Intent.FLAG_ACTIVITY_NO_ANIMATION);
 startActivity(intent);
 Splash.this.finish();
 } catch (InterruptedException e) {
 // do nothing
 } finally {
 Splash.this.finish();
 }

}
 };
 splashTread.start();

}

}
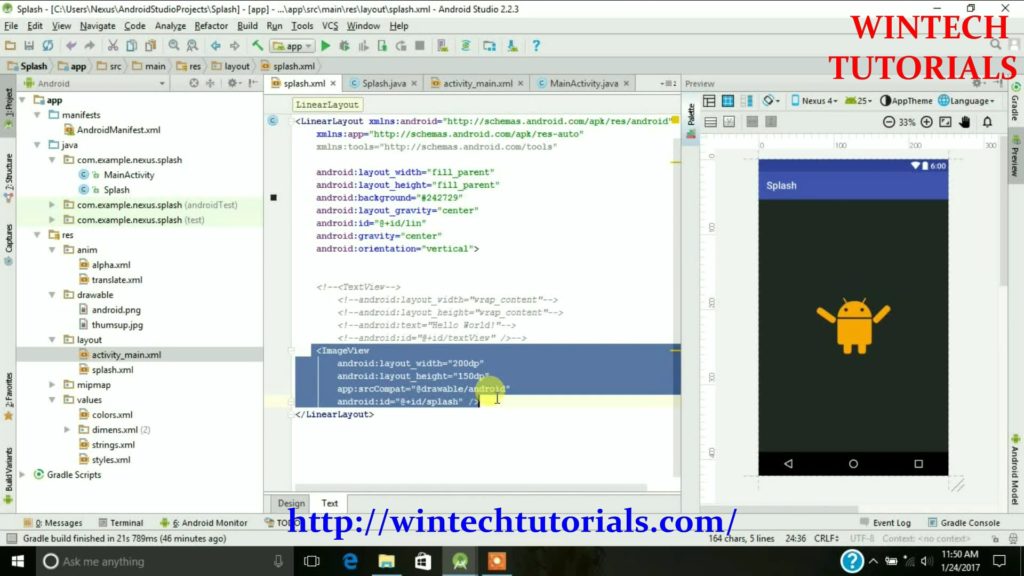
splash.xml
<?xml version="1.0" encoding="utf-8"?>
<LinearLayout xmlns:android="http://schemas.android.com/apk/res/android"
 android:layout_width="fill_parent"
 android:layout_height="fill_parent"
 android:background="#242729"
 android:layout_gravity="center"
 android:id="@+id/lin"
 android:gravity="center"
 android:orientation="vertical"
 android:weightSum="1">

<ImageView
 android:layout_width="200dp"
 android:layout_height="150dp"
 android:id="@+id/splash"
 android:background="@drawable/android"
 android:layout_weight="0.11" />

</LinearLayout>
alpha.xml
This is the part where the animation duration is set.
<?xml version="1.0" encoding="utf-8"?>
<alpha
 xmlns:android="http://schemas.android.com/apk/res/android"
 android:fromAlpha="0.0"
 android:toAlpha="1.0"
 android:duration="3000" />
translate.xml
This is used for transform the backgroud of the screen.
<?xml version="1.0" encoding="utf-8"?>
<set
 xmlns:android="http://schemas.android.com/apk/res/android">

<translate
 xmlns:android="http://schemas.android.com/apk/res/android"
 android:fromXDelta="0%"
 android:toXDelta="0%"
 android:fromYDelta="200%"
 android:toYDelta="0%"
 android:duration="2000"
 android:zAdjustment="top" />

</set>
activity_main.xml
<?xml version="1.0" encoding="utf-8"?>
<RelativeLayout xmlns:android="http://schemas.android.com/apk/res/android"
 xmlns:app="http://schemas.android.com/apk/res-auto"
 xmlns:tools="http://schemas.android.com/tools"
 android:id="@+id/activity_main"
 android:layout_width="match_parent"
 android:layout_height="match_parent"
 android:paddingBottom="@dimen/activity_vertical_margin"
 android:paddingLeft="@dimen/activity_horizontal_margin"
 android:paddingRight="@dimen/activity_horizontal_margin"
 android:paddingTop="@dimen/activity_vertical_margin"
 tools:context="com.example.nexus.splash.MainActivity">
 <ImageView
 android:layout_width="wrap_content"
 android:layout_height="wrap_content"
 app:srcCompat="@drawable/thumsup"
 android:id="@+id/imageView" />
</RelativeLayout>
Output:
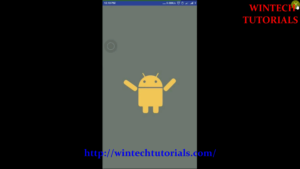
this splash screen will appear only for 3 second
as the time dulation
One thought on “Android Animated Splash Screen”
whenever the splash screen finish it crash the app.
plz help me to solve this